Kido Protect Parental Control Guides
All the guides that parents need to properly install and set Kido Protect Solution on their children's devices.
All the guides that parents need to properly install and set Kido Protect Solution on their children's devices.
This video will explain all steps and methods to help you install the Kido Protect app on your device and also on your child’s device in the best possible way.
Please follow these steps to properly install the app on parent device:
Open the Play Store on the parent device (limited version). Alternatively, you can download the full version of our app from our website at https://www.kidoprotect.com/download.
You can download our app from Play store, open play store on the parent device and search Kido Protect, this version will be limited features as Play store had some restrictions on some features (Calls & SMS, Screenshots will be missing), or you can download our full version from our website at https://www.kidoprotect.com/download.
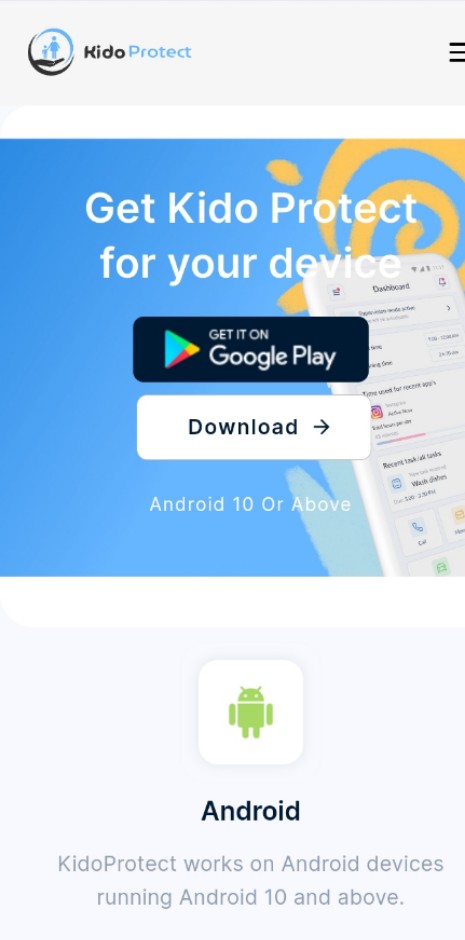
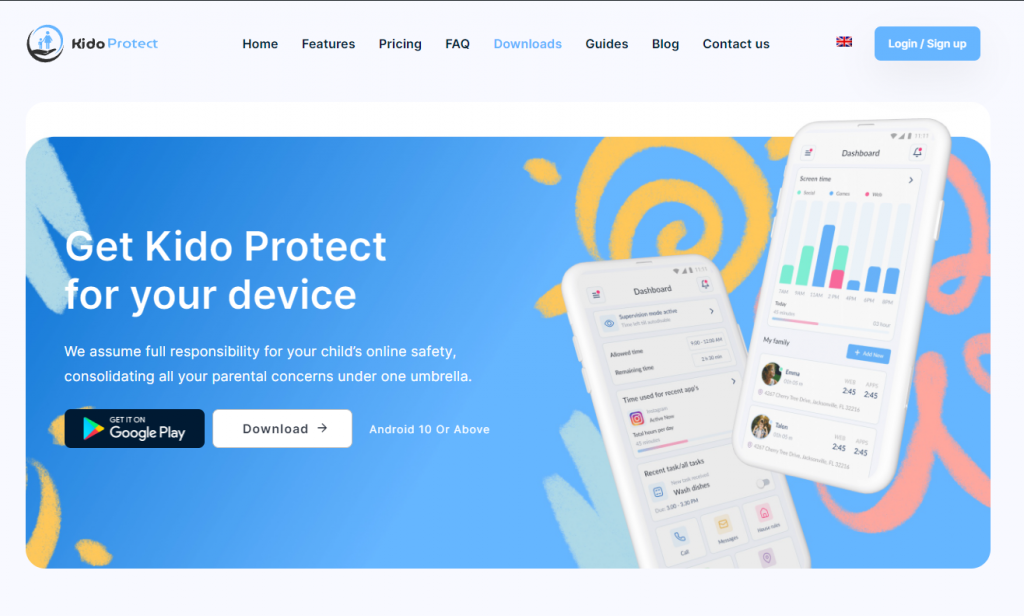
Install the app and follow the instructions given by the app, or you can register at https://www.kidoprotect.com/sign-up/.
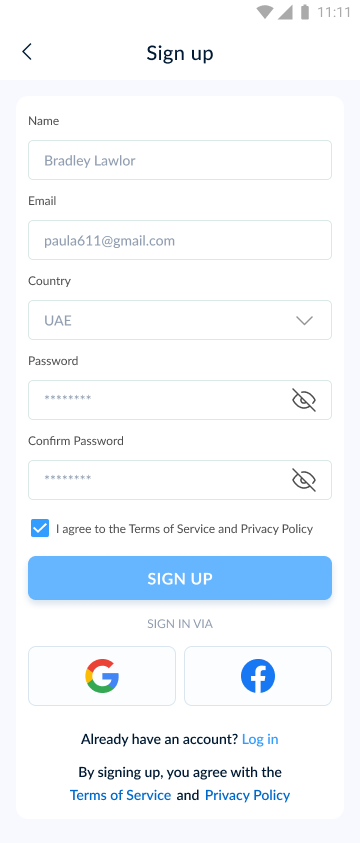
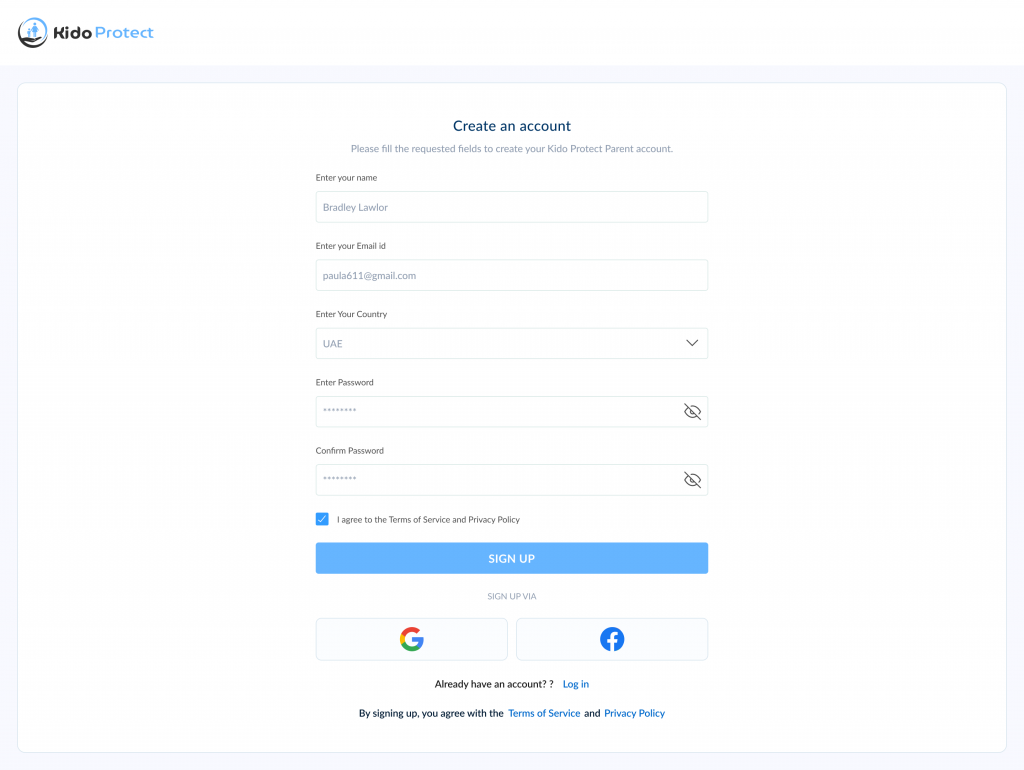
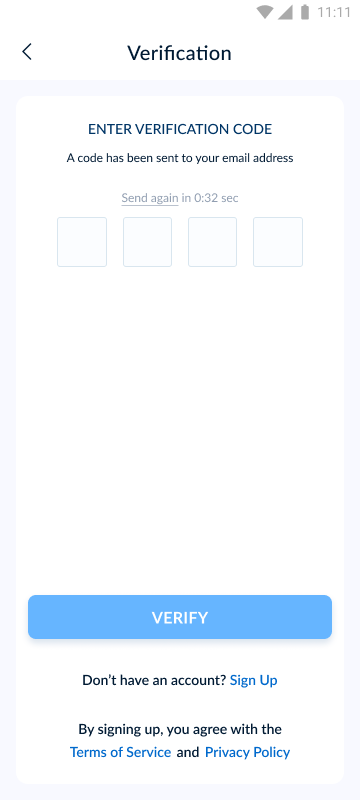
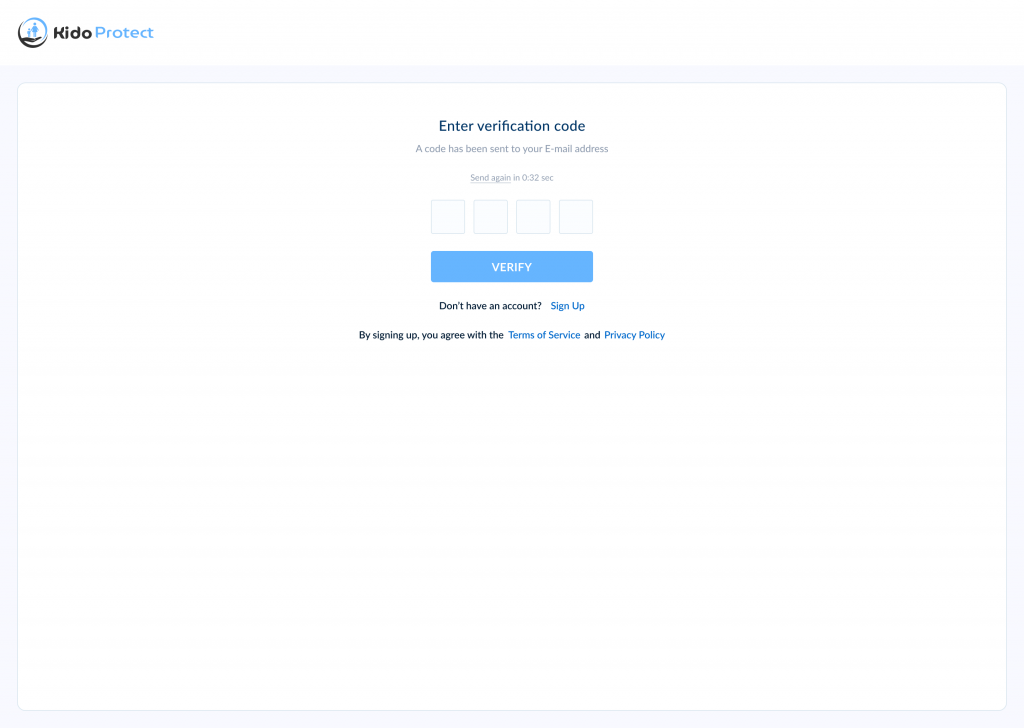
Please verify your email OTP.
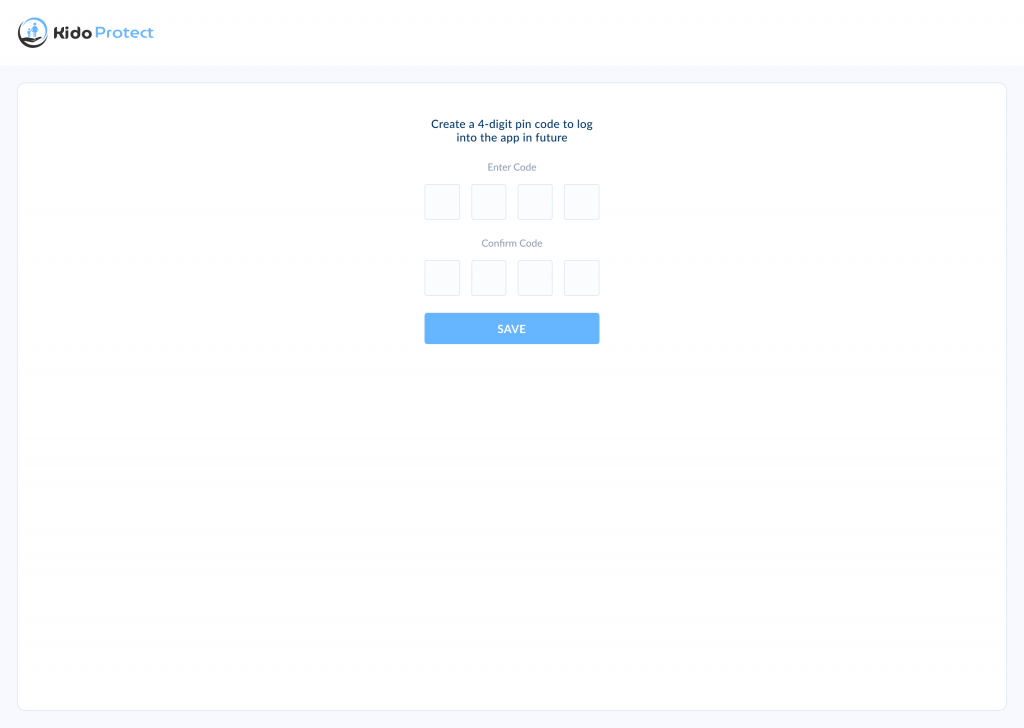
Generate an emergency PIN code for password recovery and easy app access.

That’s it, easy as pie!!
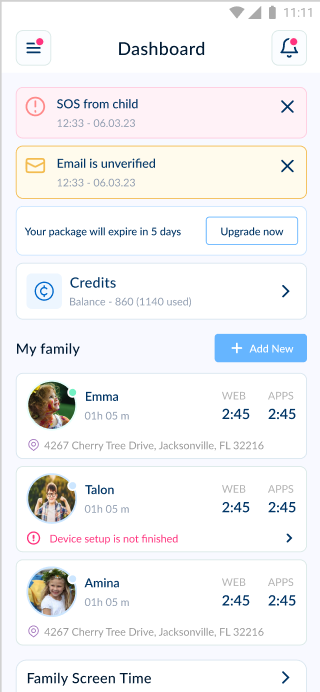
For pairing child’s device please click here to open ‘Child’s Device Pairing’.
For easy pairing of your child’s device, use our ‘Kido Protect tool for Windows’ pairing method. click here to see the full guide. Or you can follow the other way of pairing shared in this post:
Open Kido Protect on Parent’s Device
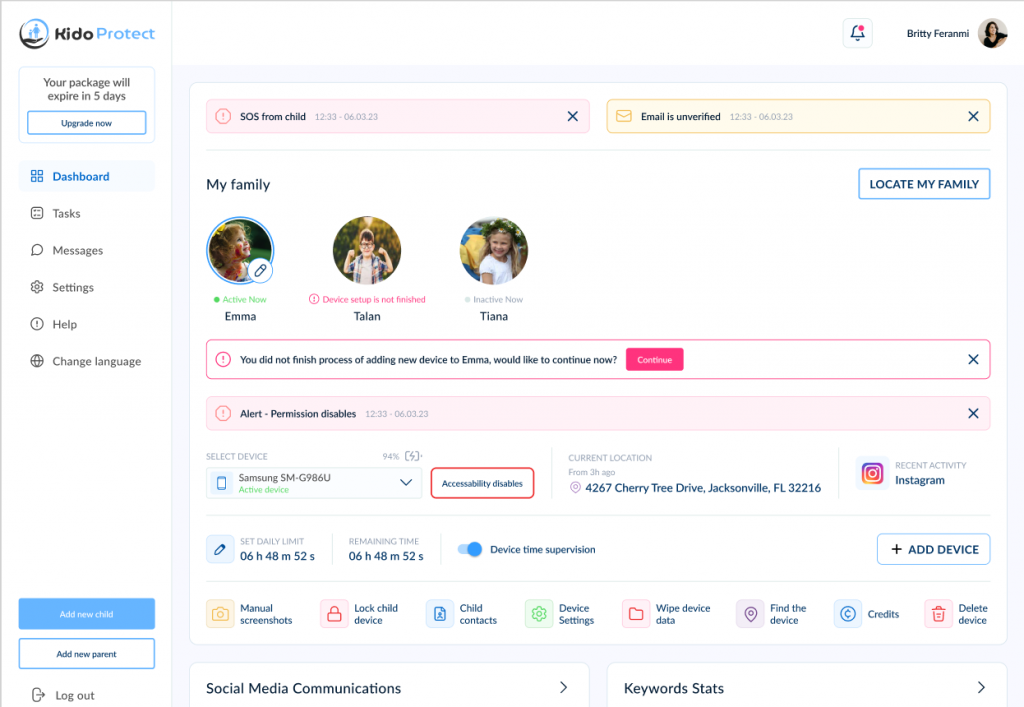
Click ‘Add Child Device’ from the dashboard within the app or on our web portal.
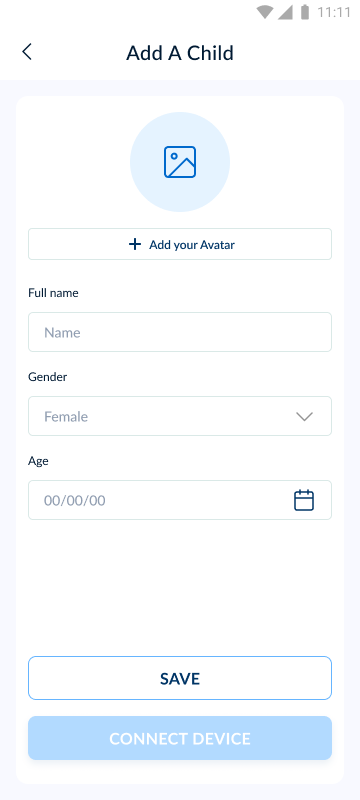
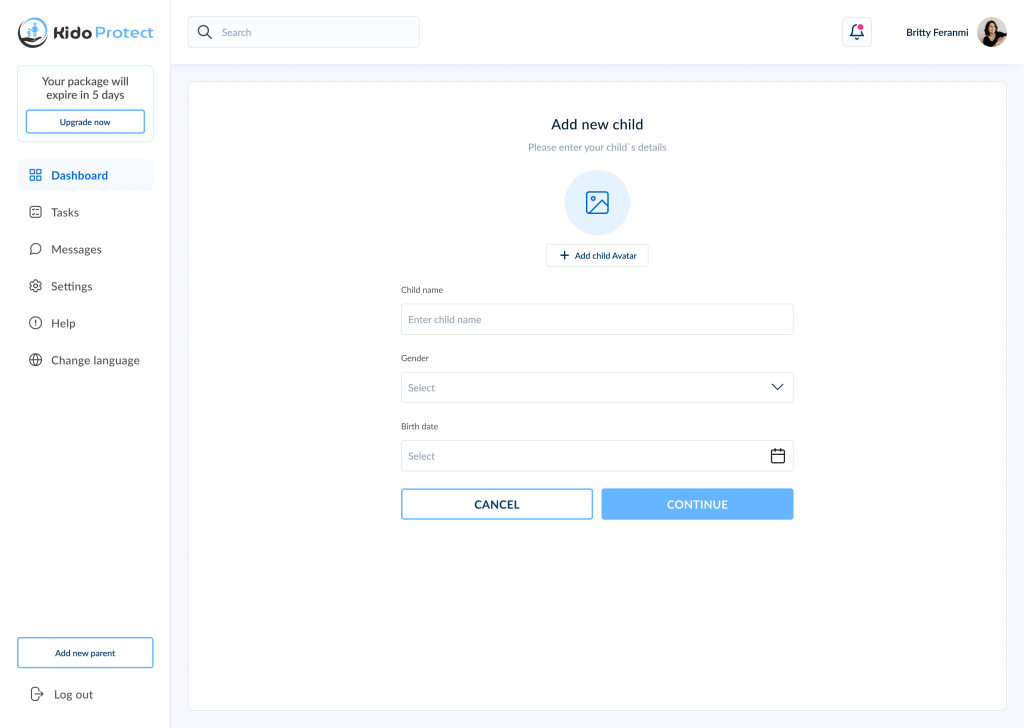
After filling out fields, click ‘Continue’ for a QR code. Scan on your child’s device.
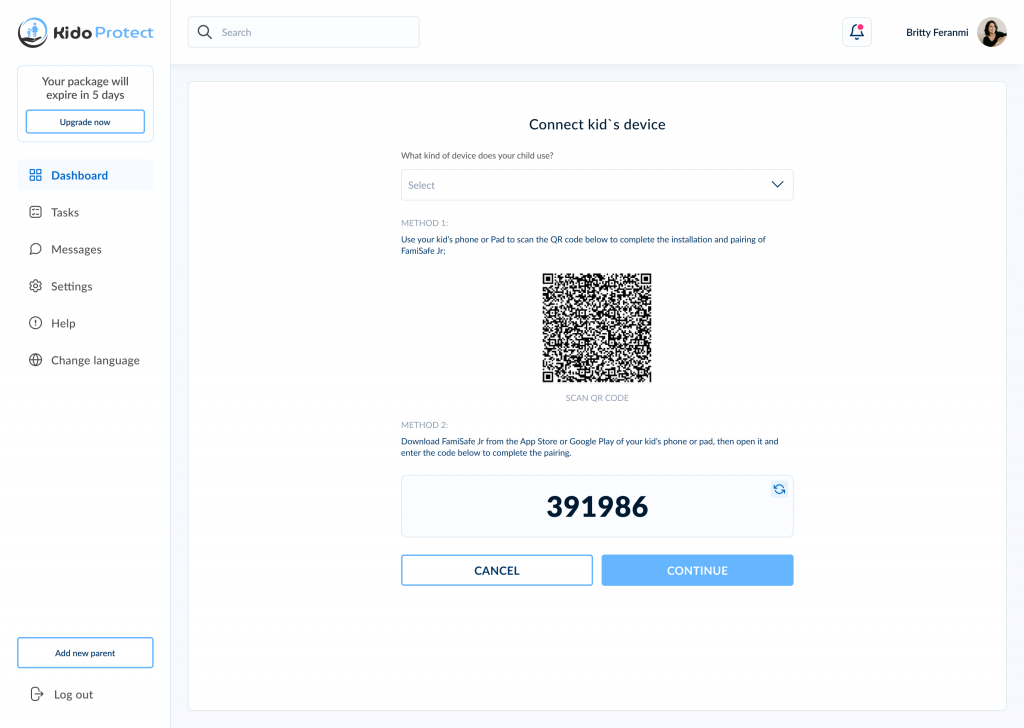
Also, download and install the same APK that we used for parent registration. (Suggestion: For the best parental control features, please download the full version from the Kidoprotect website.)
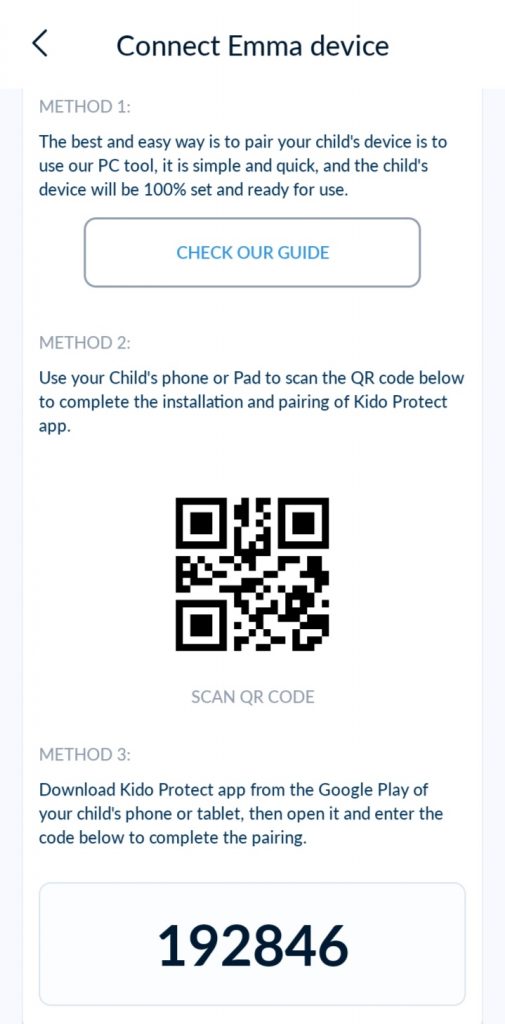
Now you can pair your child’s device in three ways: You can pair it through a QR code, an 6-digit code, or via the Windows installer (this is the easiest and most reliable way to pair your child’s device).
1) Pair through QR Code.
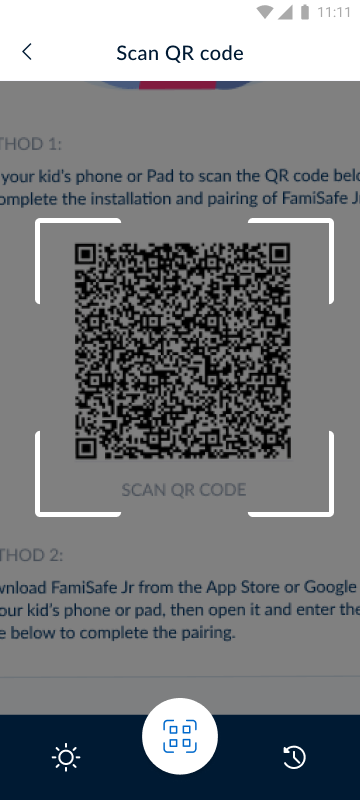
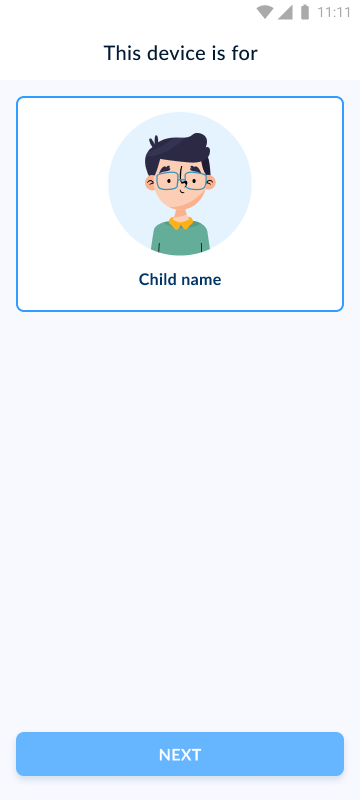
2) Pair through 6-Digits Code.


3) Pairing through the Windows installer is recommended and easy. If you want to know how to pair through the Windows installer, please refer to the ‘Pair Through Windows Installer’ guide.
Enter name for your child device and click on save.
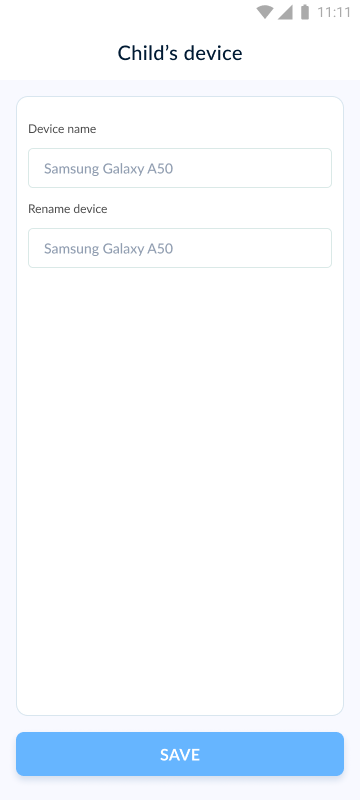
Enable all the features. If you’re confused about enabling a feature, please use our Windows installer, which is very easy and automatically enables all the permissions required for the APK.
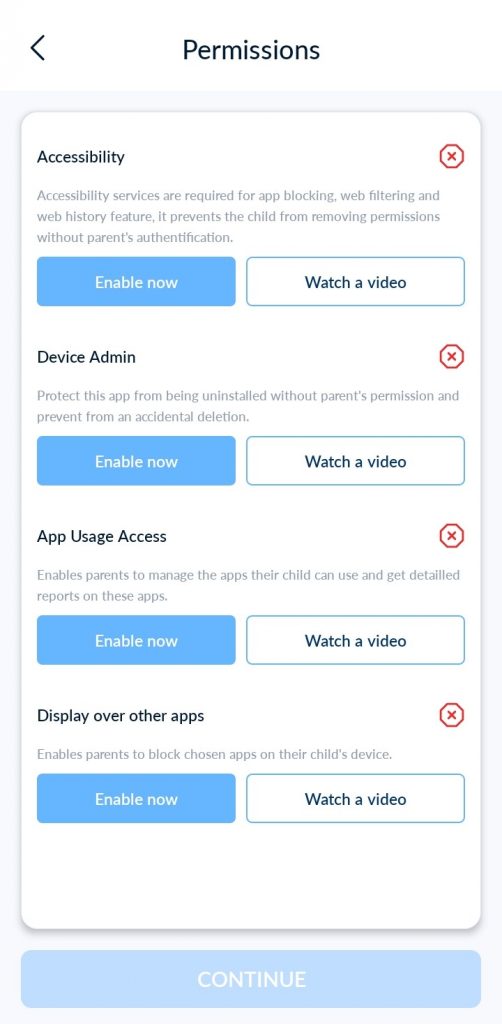
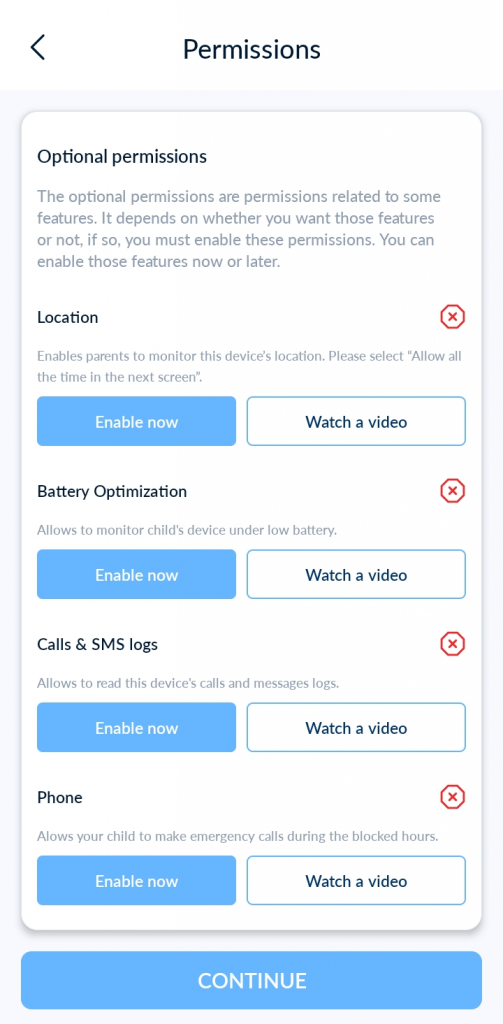
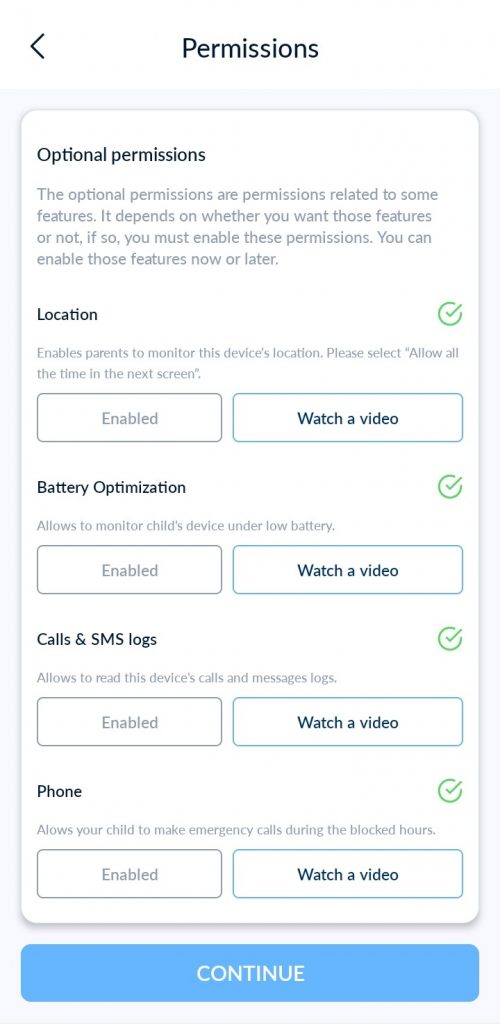
Every permission has its tutorial video next to it. If you need any tips, please click on ‘Watch a video’ to view the tutorial.
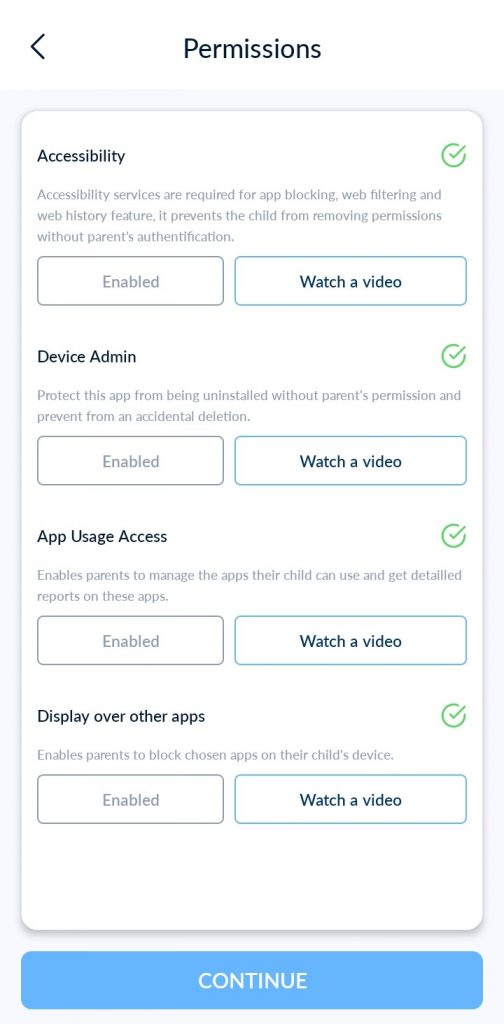
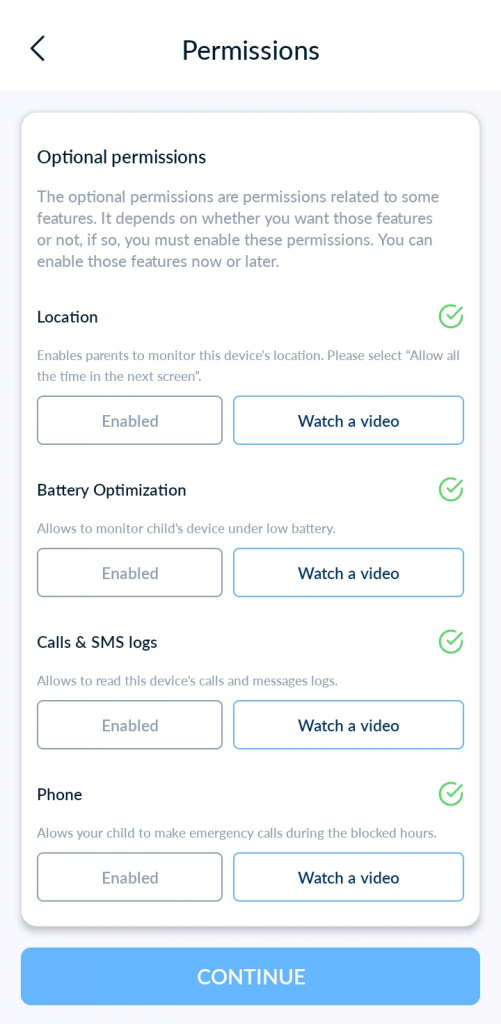
After completing the permissions, click on ‘Continue.’ You will then be redirected to the dashboard,
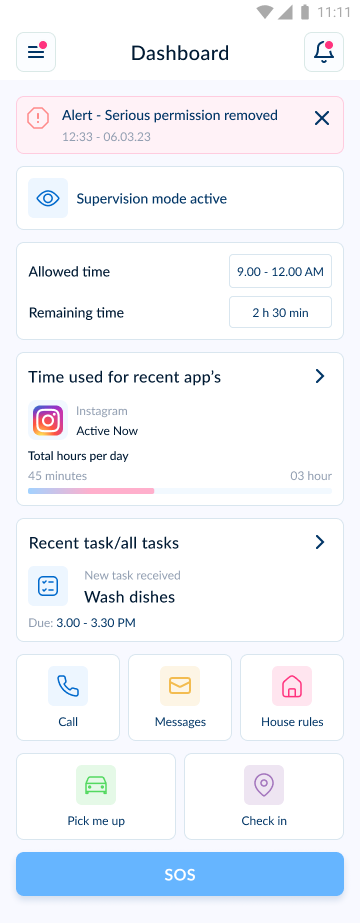
You can edit, update, or remove any permission you set on your child’s device at any time by following these steps:
First, open the parent app to check which permissions are enabled and which are disabled.
To check the permissions, open the child profile and click on ‘Device Details’; you will see the list of permissions.
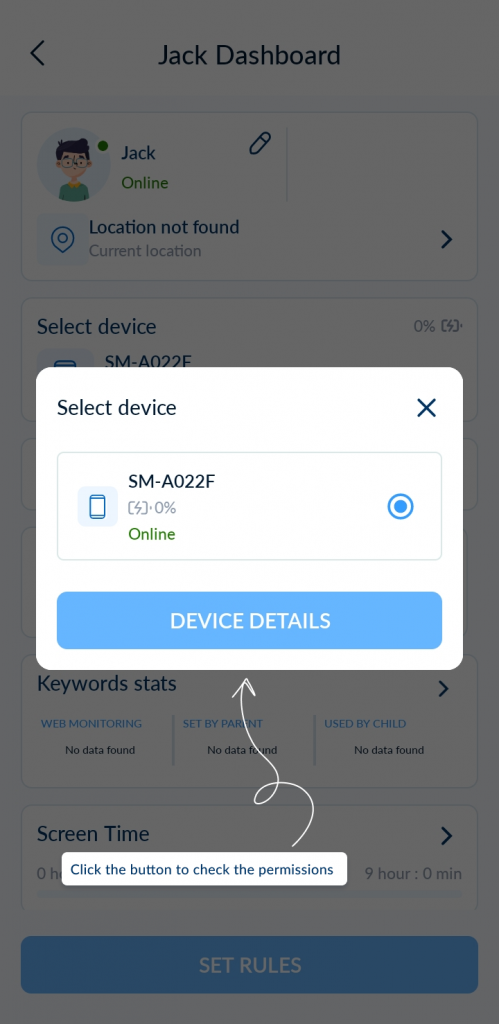
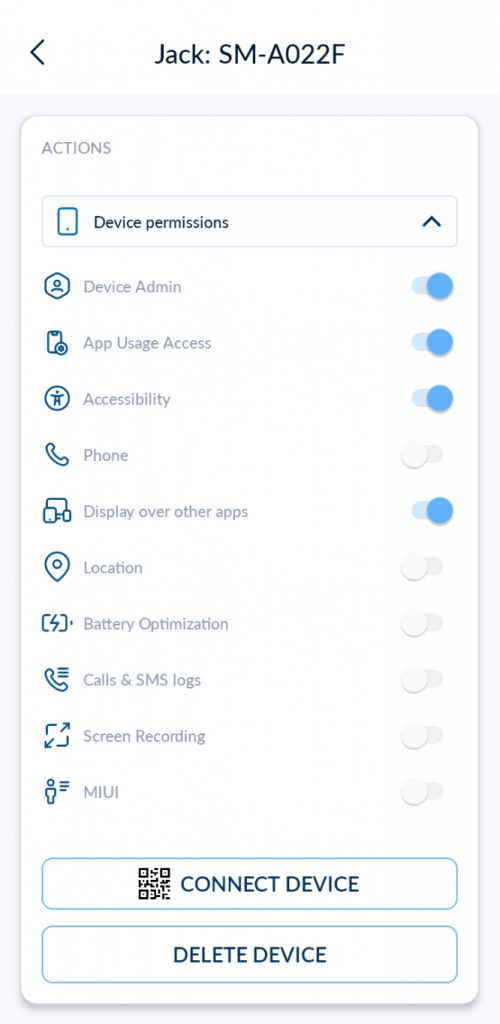
Now, to enable the disabled permissions, please open the child application.
And click on ‘Permission’ from the hamburger menu. Enter the 4-digit passcode, and you will see all the permissions. Now, grant the permissions you want to enable.
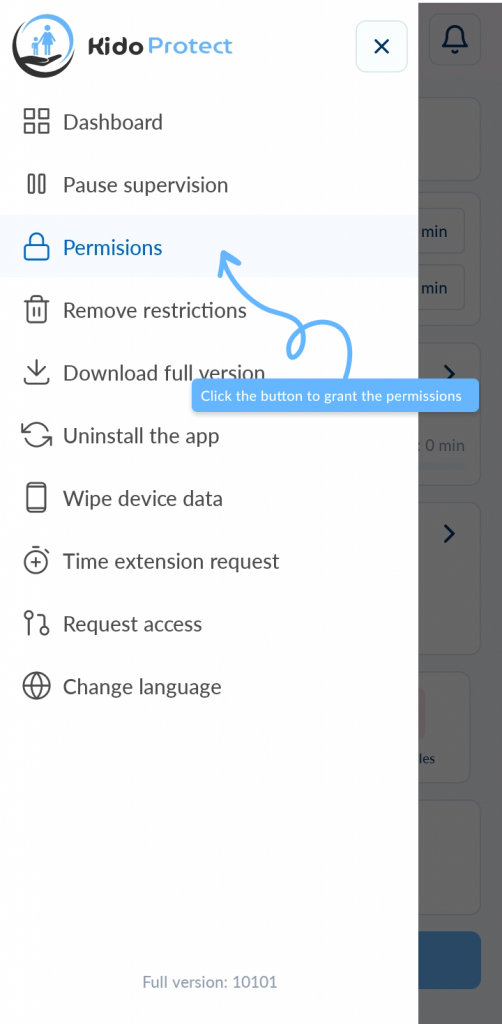

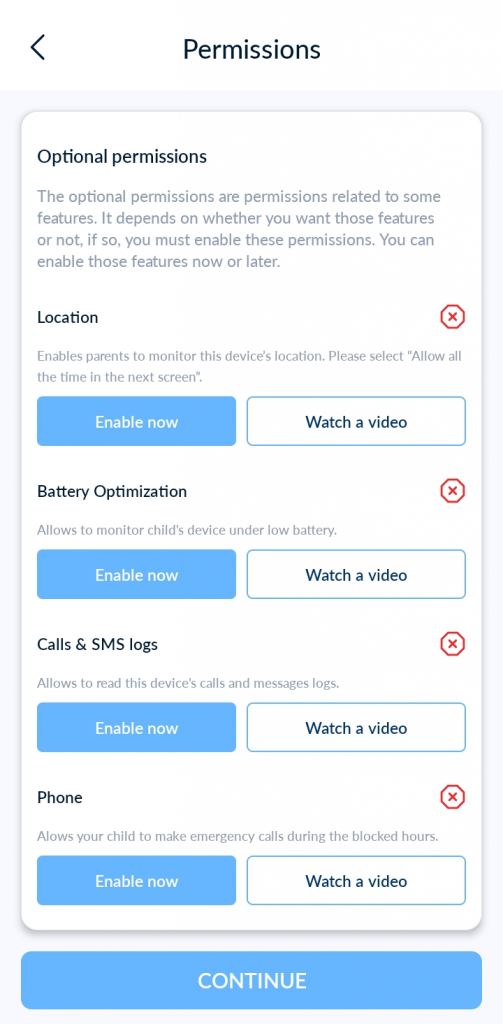
Click on ‘Enable’, and it will navigate you to the specific permission location in the phone settings. If you are still confused, click ‘Watch Video’ to see the tutorial.
How To Pair an Android Child Device through our windows installer.
How to pair Android child devices running Android OS 7+ to your KidoProtect account:
You can also complete installation through KidoProtect Windows installer.
Download the appropriate version of KidoProtect, depending on your computer type.
Launch the newly downloaded KidoProtect application from your Downloads / Applications.
Follow the on-screen instructions to run your child’s Device through the KidoProtect installation. We’ve included a visual guide to help get you through windows installer below!
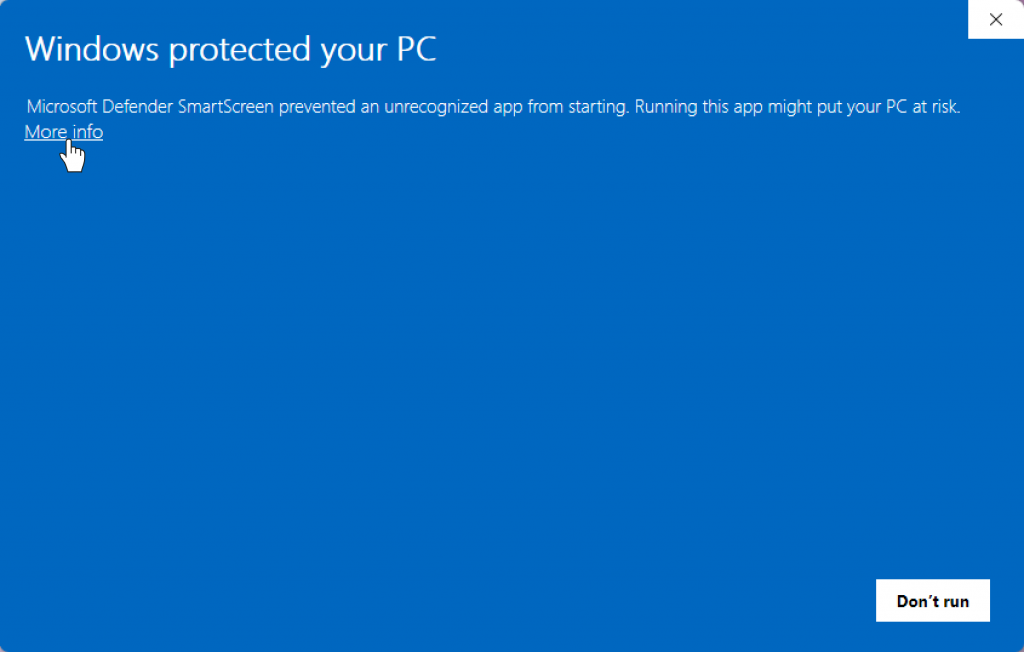
Click on “More info”
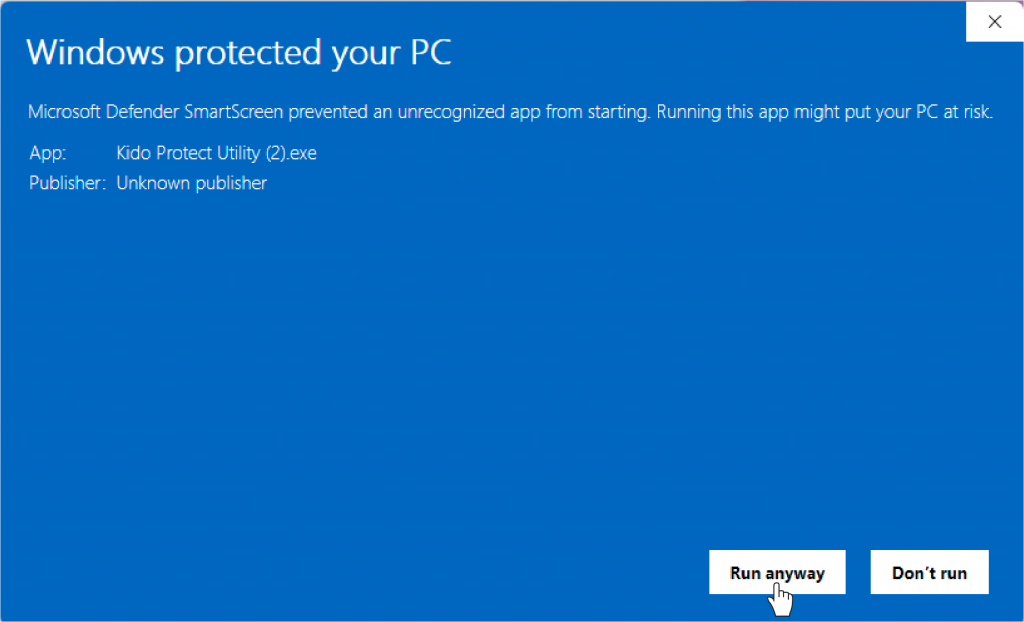
Now Click on “Run anyway” To start the installation.
Start by Entering your Kido Protect account email and password.

Select ‘Pair’ and Android for the device type. Do not connect your child’s device to your computer yet.

Choose to pair your child’s device to an already existing profile or create a new one.

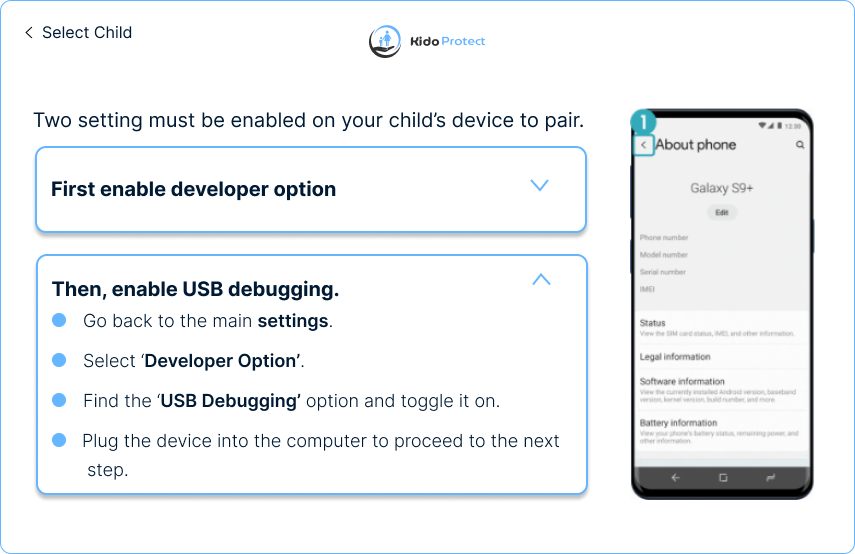
Follow the on-screen instructions to enable developer options on your child’s device.

Enable USB Debugging and accept the prompt on your child’s device. Once enabled, connect your child’s device to your computer using a USB cable.

Consent to the Data & Privacy agreement. You can CLICK HERE to see what type of data could be collected while using OurPact.

The next step will happen automatically on your child’s device. Please do not disconnect your child’s device from your computer until you see the ‘Success’ screen at the end of the Connect installation.

Success! You can now disconnect your child’s device and enjoy KidoProtect’s management!

Parental control applications allow you to set clear rules for your child’s digital device usage, including managing screen time, filtering harmful content, blocking certain apps, tracking online activity, and much more.
Watch the video below to learn how you can set rules for your child’s devices.
Once you’ve completed installing the KidoProtect app and no longer need USB debugging, you should disable this feature along with other developer options. To do this, turn off the Developer options toggle in the Settings menu.
Disabling Developer options is straightforward—just go to Settings and then Developer options to turn it off.
Depending upon your device’s Android OS version and manufacturer’s brand, navigate to Developer options by following the above steps.
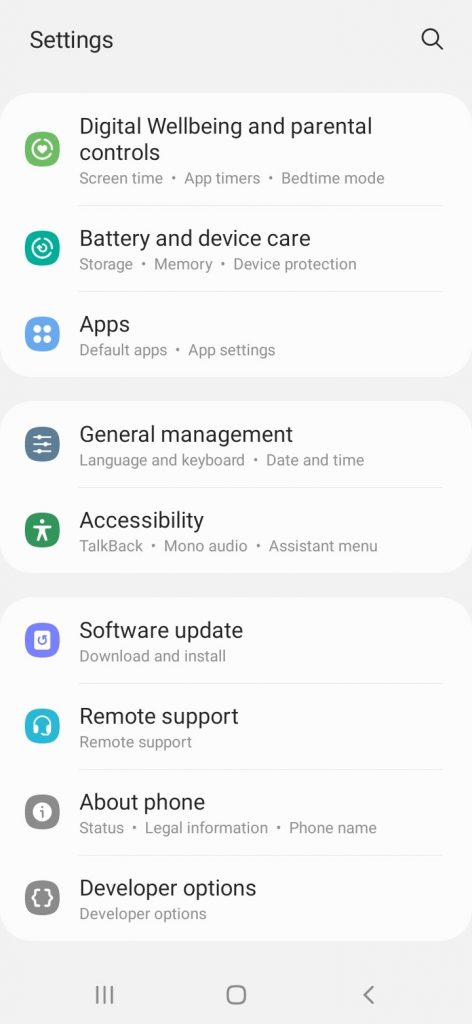
Then Developer options to turn it off.
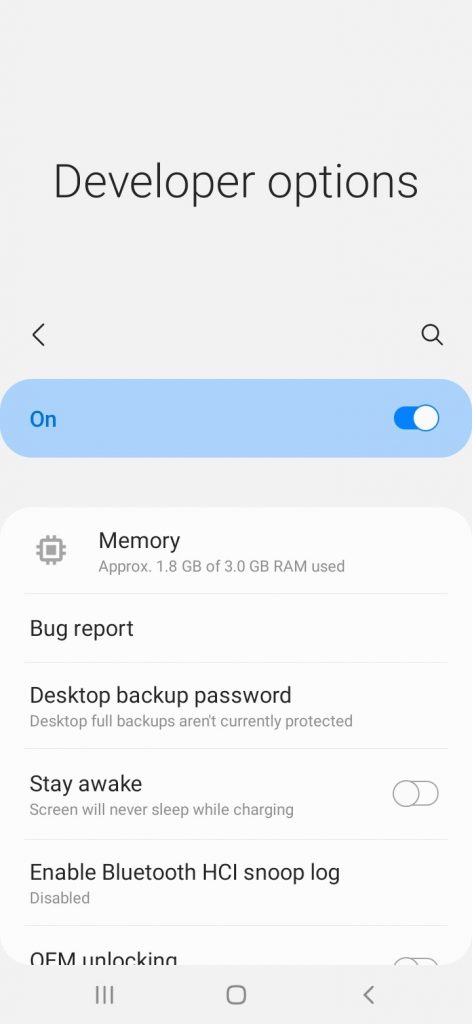
Once you disable (or deactivate) Developer options, you can’t be able to access this feature from Settings.
To ensure Kido Protect runs smoothly in the background, you’ll need to adjust your VIVO phone settings. This guide will show you how to allow background power usage for our app.
Note: It is essential to disable battery optimization and enable “Run app in background” for the Kido Protect app on Vivo, Oppo, Realme, Infinix, and other devices that restrict app background execution.
Open the “Settings” app on your VIVO phone.
Scroll down and select “Battery.”
Tap on “Background Power Consumption Management”.
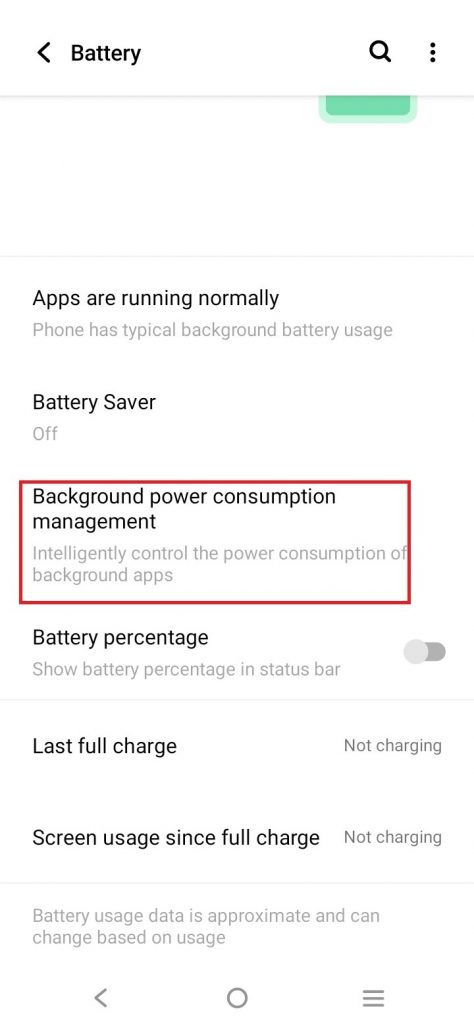
In the Background Power Consumption Management menu, find “Kido Protect” in the list of apps.
Tap on “Kido Protect.”
Choose “Do not restrict Background Power Usage” or “Allow background usage.”
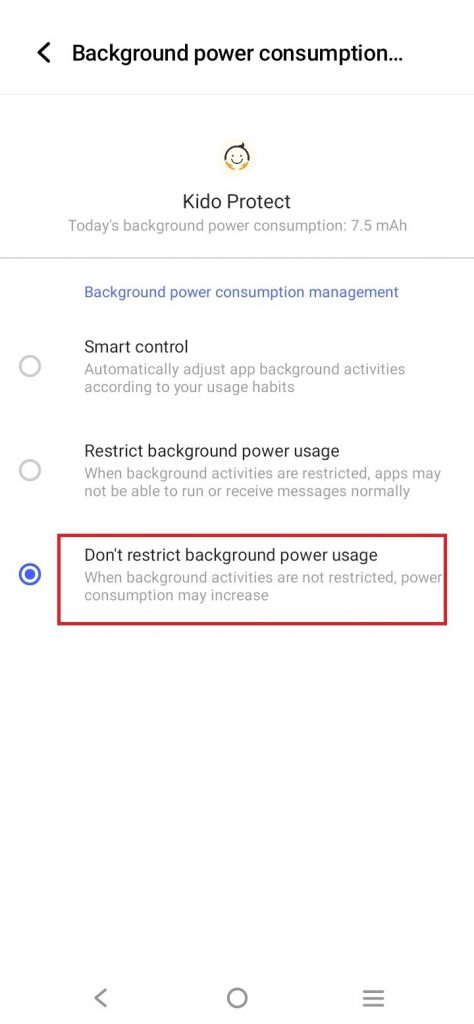
By following these steps, Kido Protect can operate in the background without issues. If you need further assistance, feel free to contact our support team.
If the Kido Protect Windows tool shows an “Unable to Pair” error, it may be because another app on the child’s device is causing a conflict. To resolve this, you can remove the app that has account access and is blocking Kido Protect from pairing. Follow these steps to remove the problematic app and fix the pairing issue.
Open the “Settings” app on your device.
Use the search bar to find “Manage Accounts.”

Tap “Manage Accounts”.
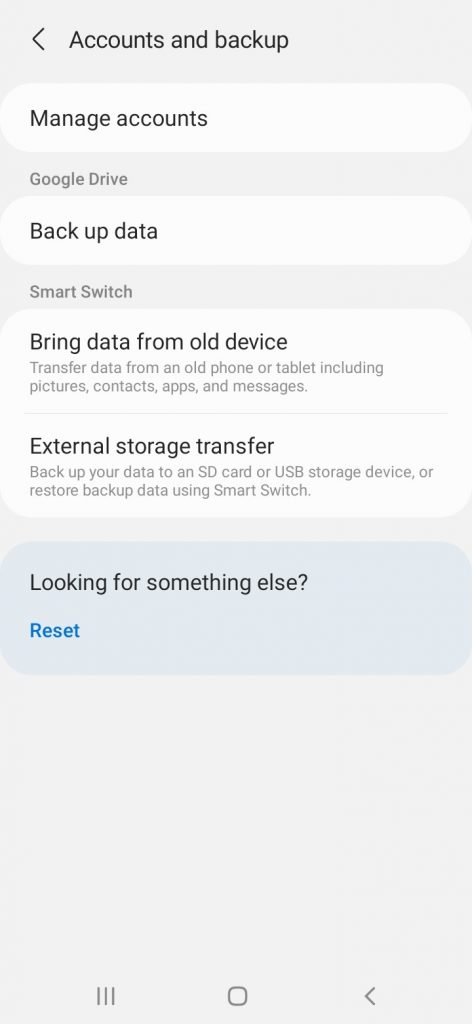
look for the app that’s causing the conflict
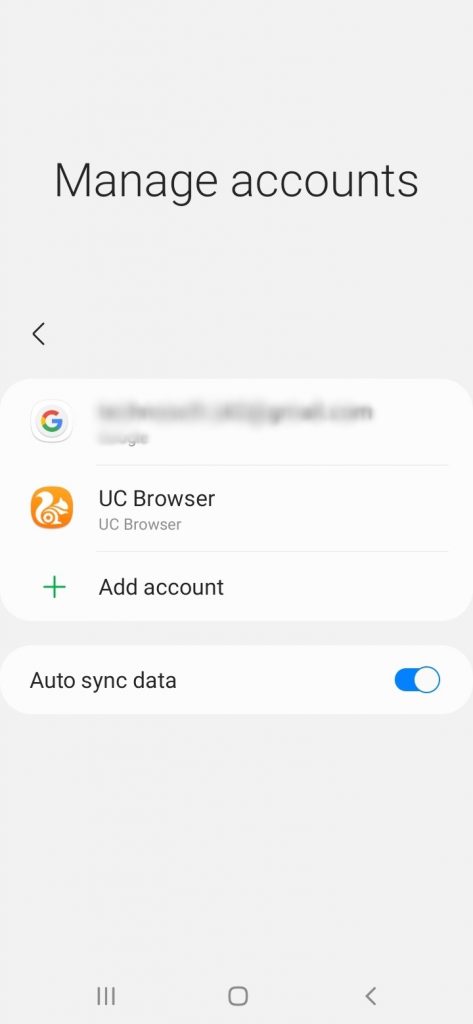
Tap on the problematic app and select “Remove” or “Delete.”
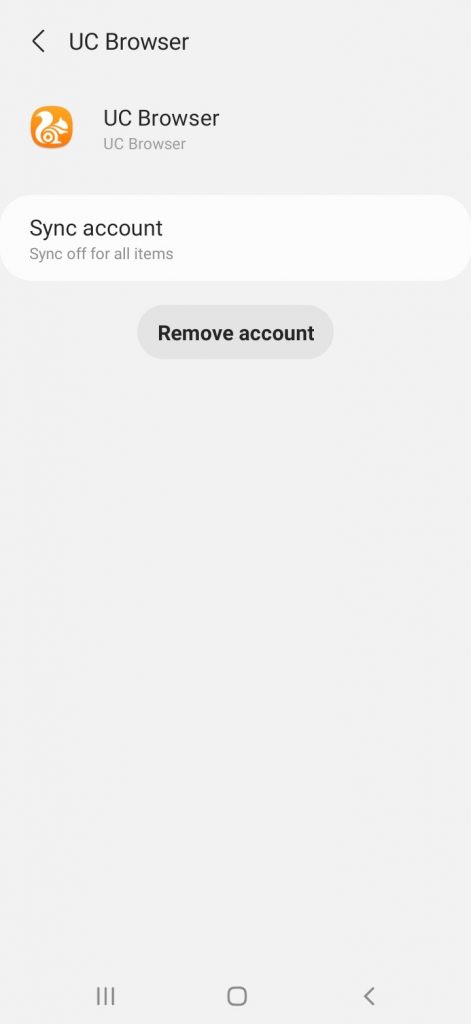
After removing the app, try using the Kido Protect Windows tool to pair the devices again.
If the Kido Protect child app has stopped monitoring and sending alerts about child usage, follow these steps to troubleshoot and resolve the issue:
Open the Kido Protect app on your child’s device.
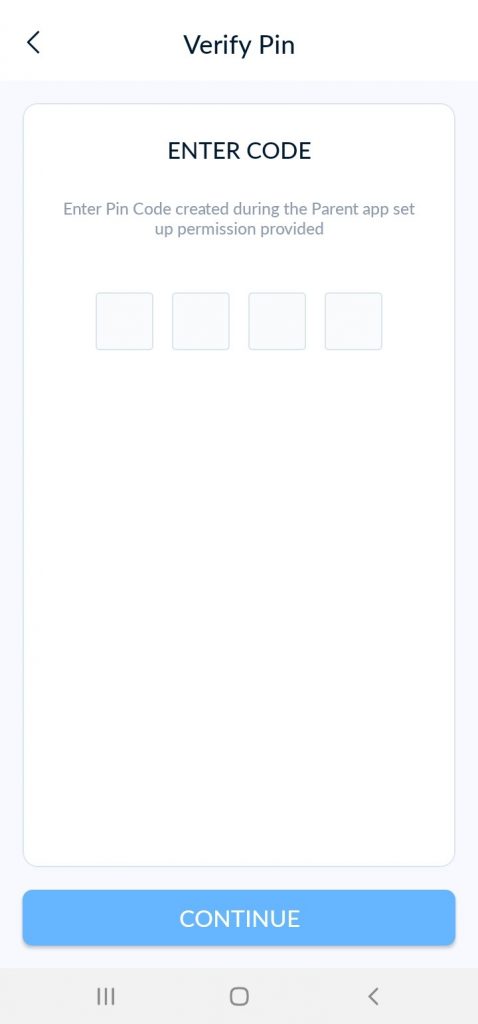
Enter the PIN code.
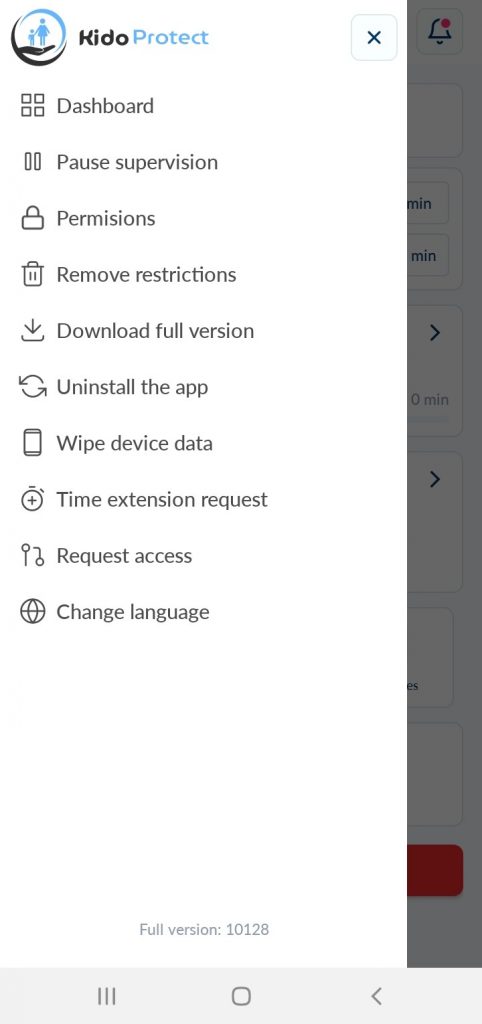
Click on the Menu icon (usually three lines) and then select “Permission.”
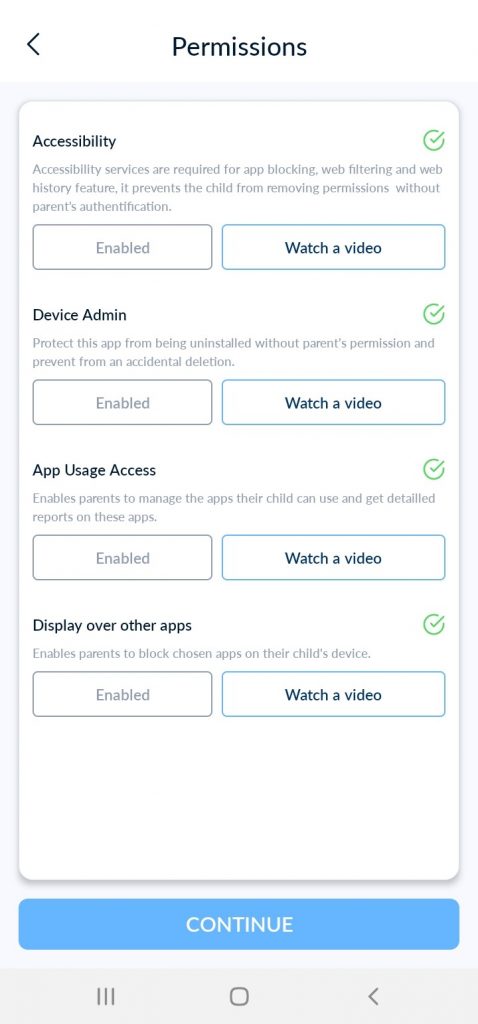
Confirm that the Accessibility permission is Enabled
Once confirmed in the Kido Protect app, open the Settings app on your child’s device.
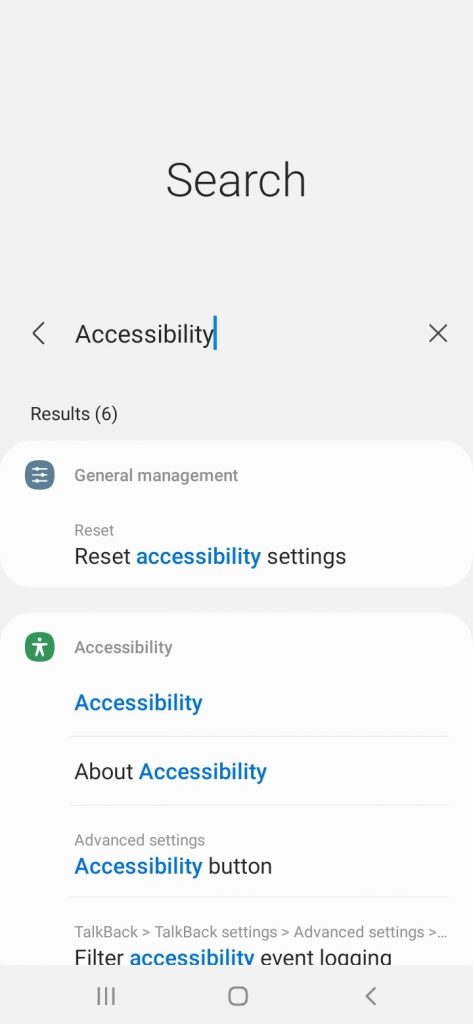
Search for “Accessibility” in the Settings.
Click on ‘Installed Service’ to find the Kido Protect option.
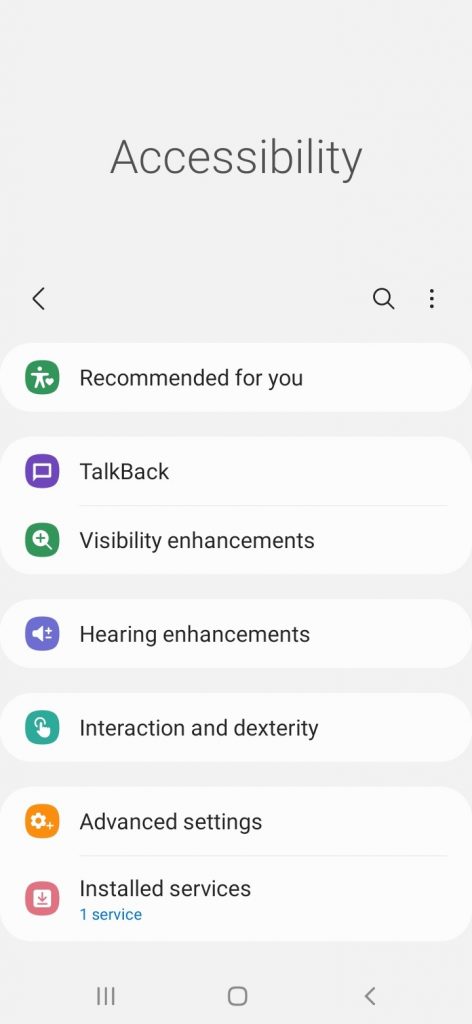
Click on ‘Installed Service’ to Find Kido Protect Accessibility and ensure it’s enabled.
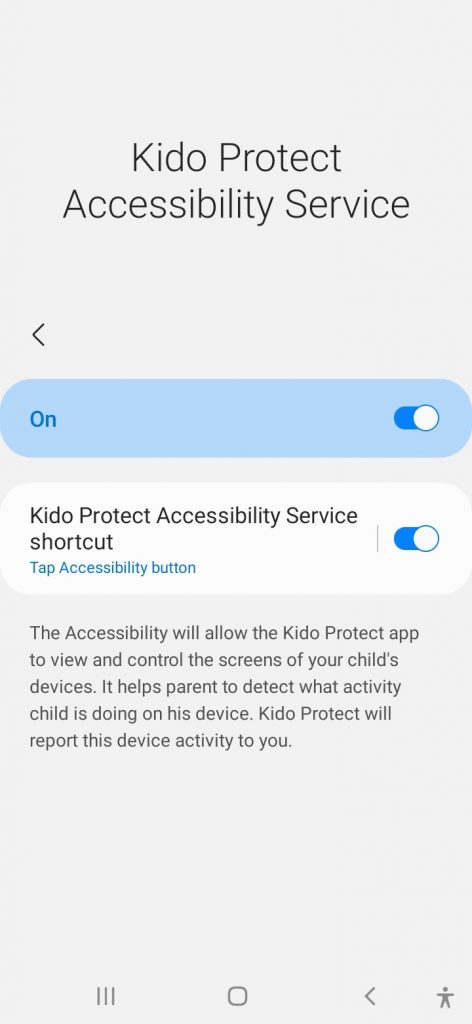
If Kido Protect is enabled but still not working, go to the Accessibility settings.
Turn off the Accessibility settings
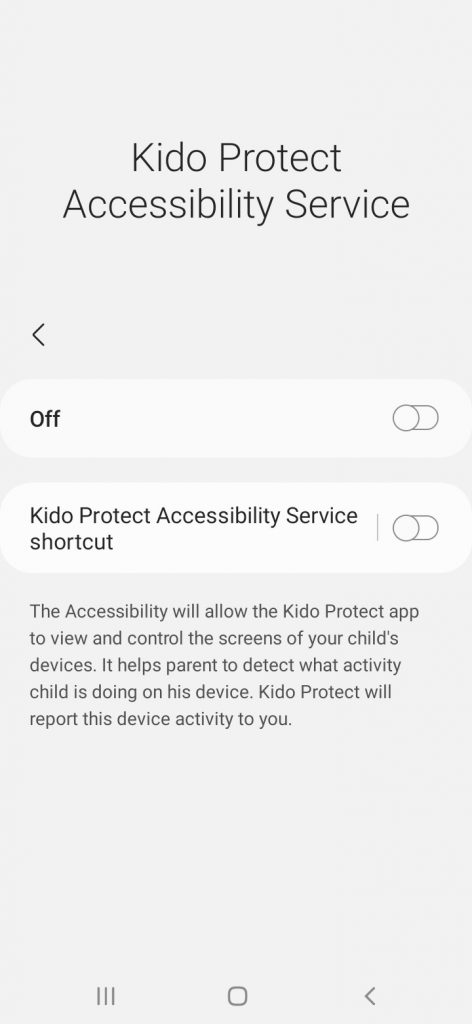
Turn it back on
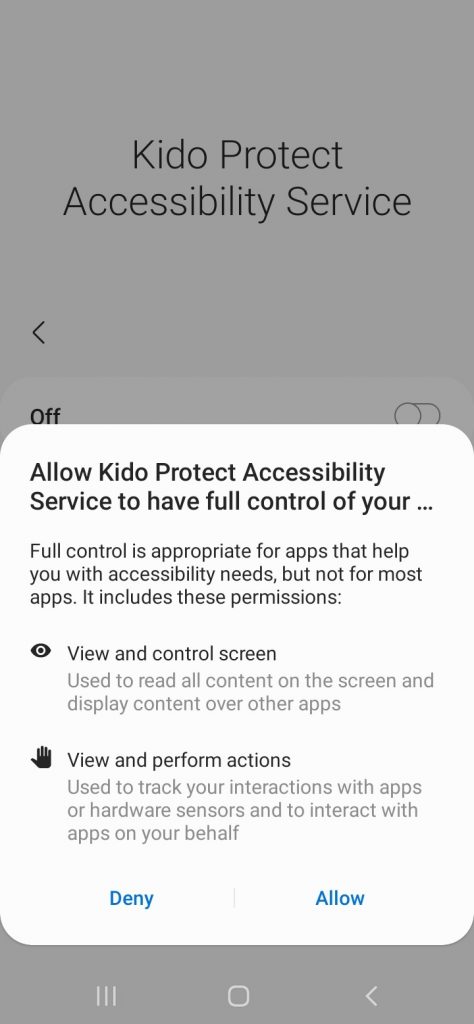

If the above steps don’t work, restart the device.
Turn it off, wait a few seconds, then turn it back on.
Note: Sometimes, if too many features are enabled quickly, like taking rapid screenshots, it can cause issues with Accessibility. This is beyond Kido Protect’s control. If problems persist, contact Kido Protect support for further help.
Remove supervision and parental controls from your child’s device by following steps.
Note: You can disable supervision on your child’s device using two methods: from your device or directly from the child’s device. Note that pausing supervision from the child’s device is temporary and limited to a maximum of 3 hours.
Open the Kido Protect app on your device.
Select your child’s profile for which you want to remove the supervision.
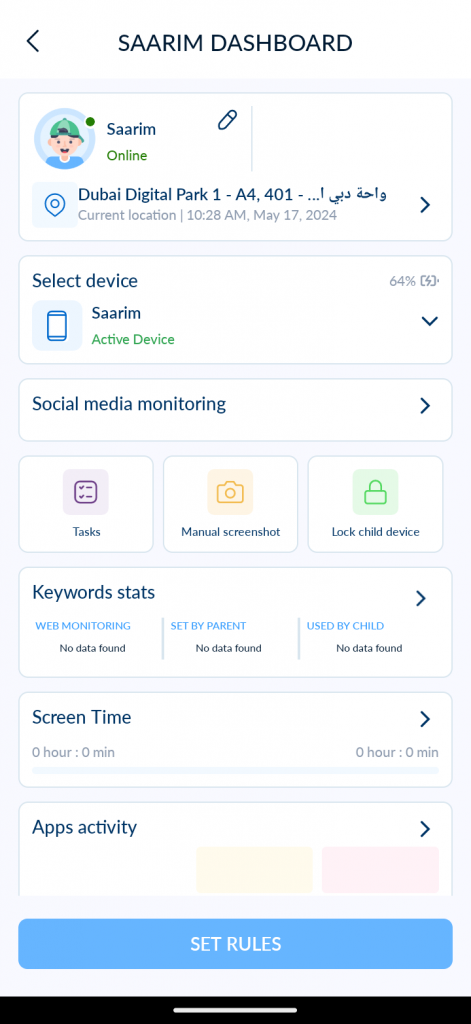
Click on “Set Rules”.
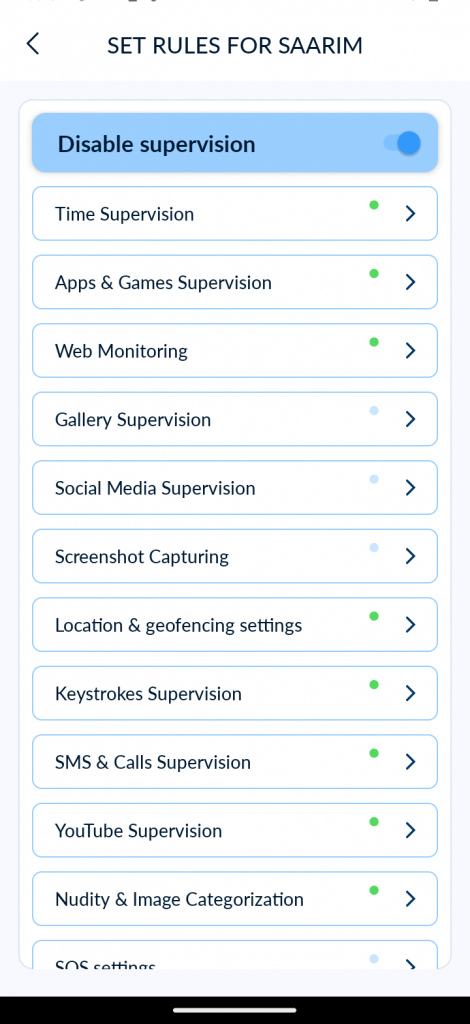
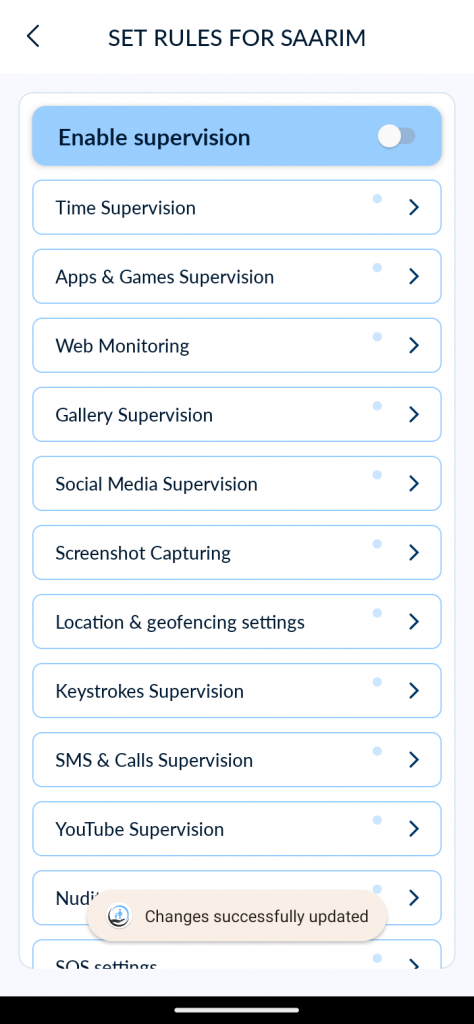
Disable the supervision. That’s it!
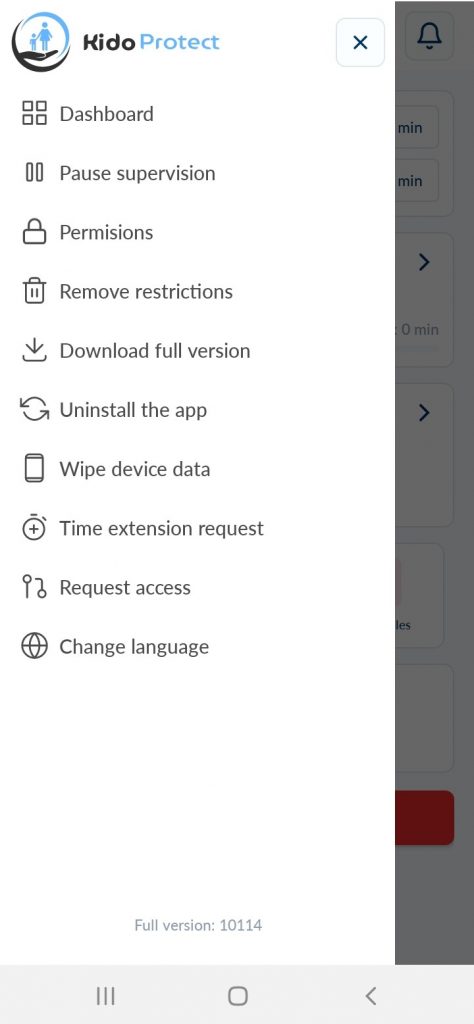
Open the Kido Protect app on the child’s device.
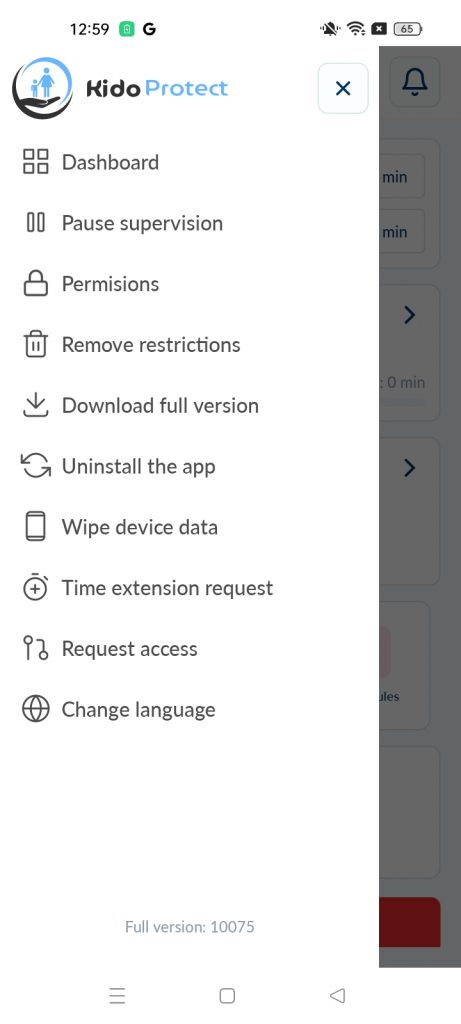
Click on the hamburger menu to open the sidebar.
Select “Pause Supervision.”
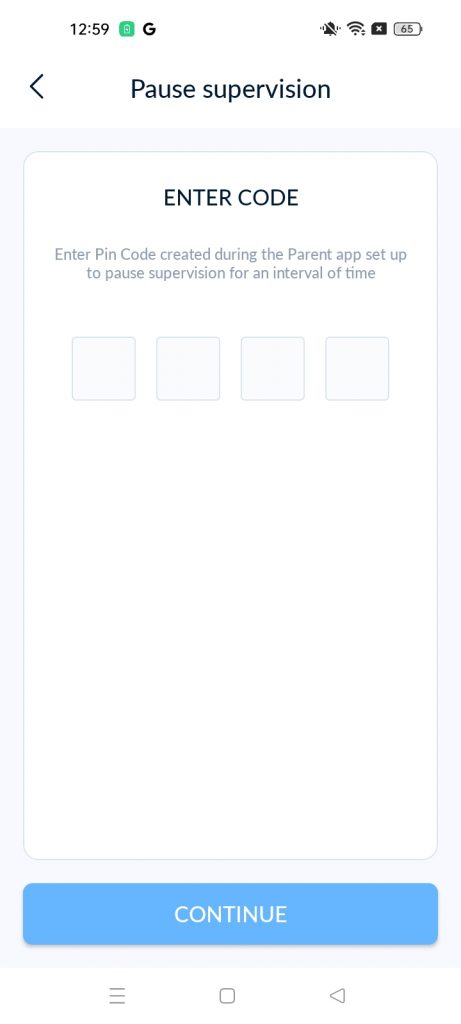
Enter the security passcode.
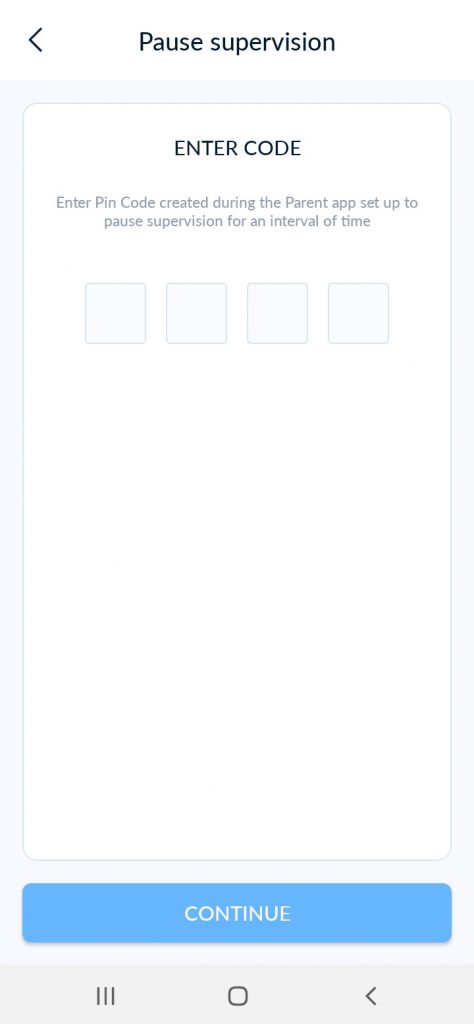
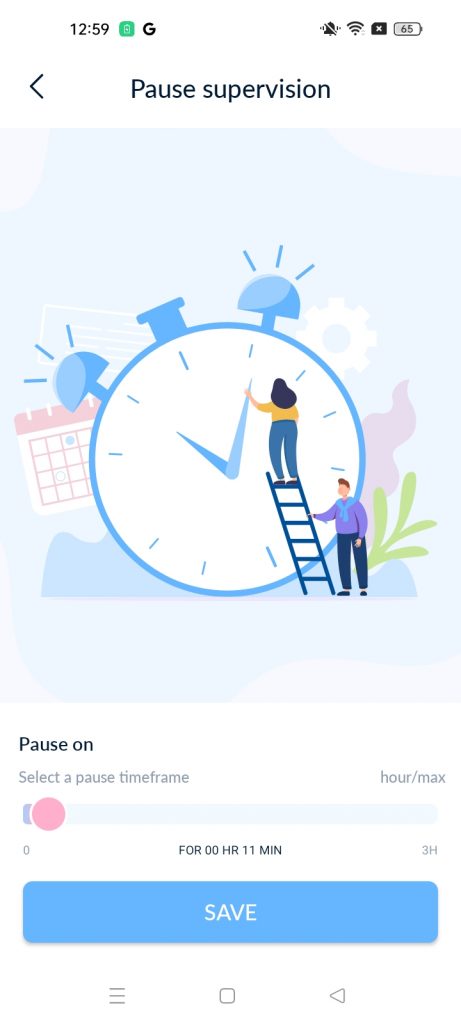
Set the duration for which you want to pause the supervision (maximum limit is 3 hours).
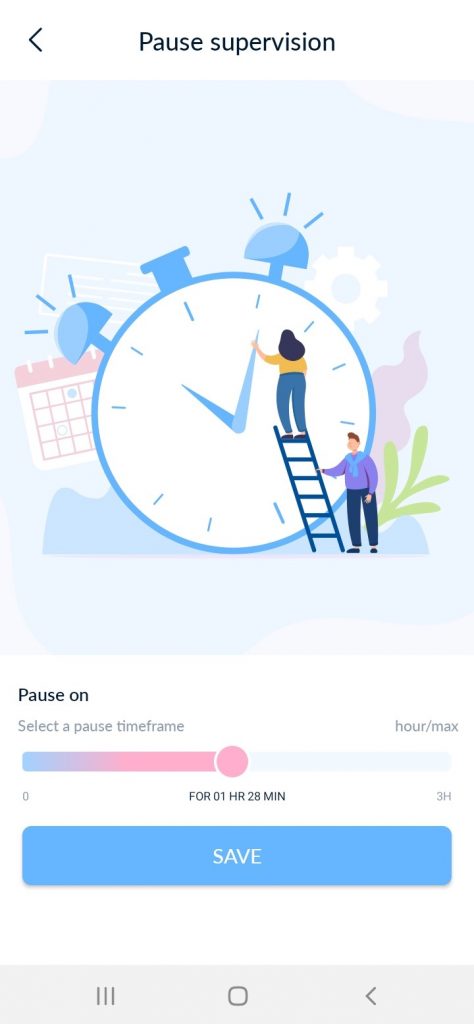
Click on Save. That’s it!
By following these steps, you can manage the supervision settings on your child’s device effectively.
To help you uninstall the Kido Protect app, we have provided two methods. Please follow the steps below to remove the app from your child’s device.
Method 1: Uninstalling from the Child App Menu
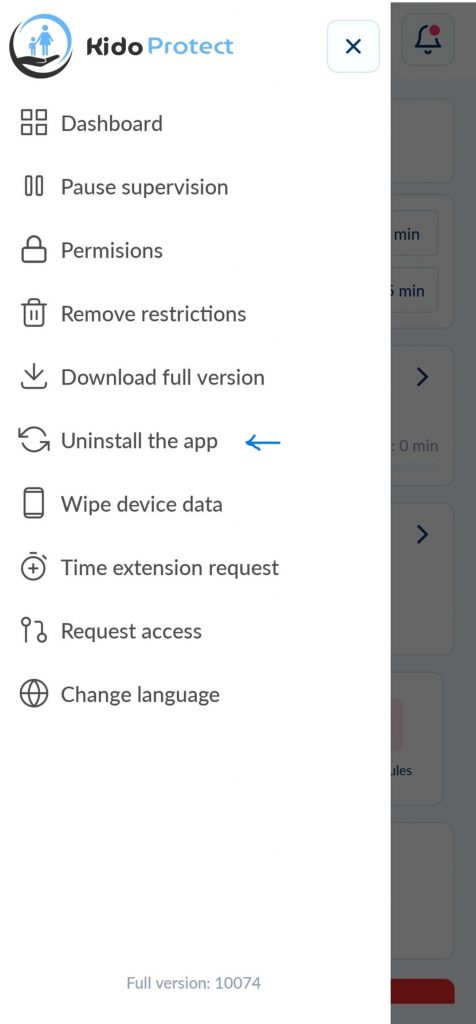
Open the Kido Protect app and enter the PIN code.
Tap the hamburger menu (three horizontal lines).
Choose “Remove Restrictions.”
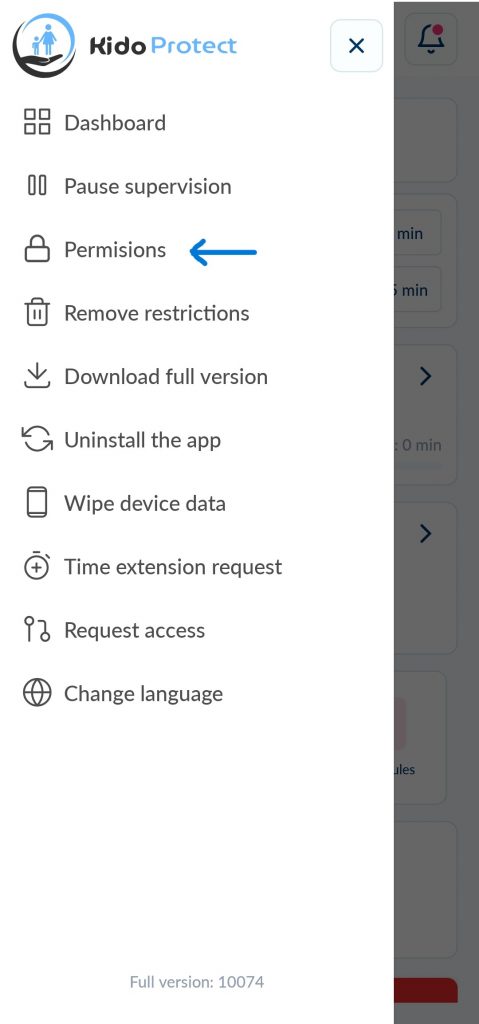
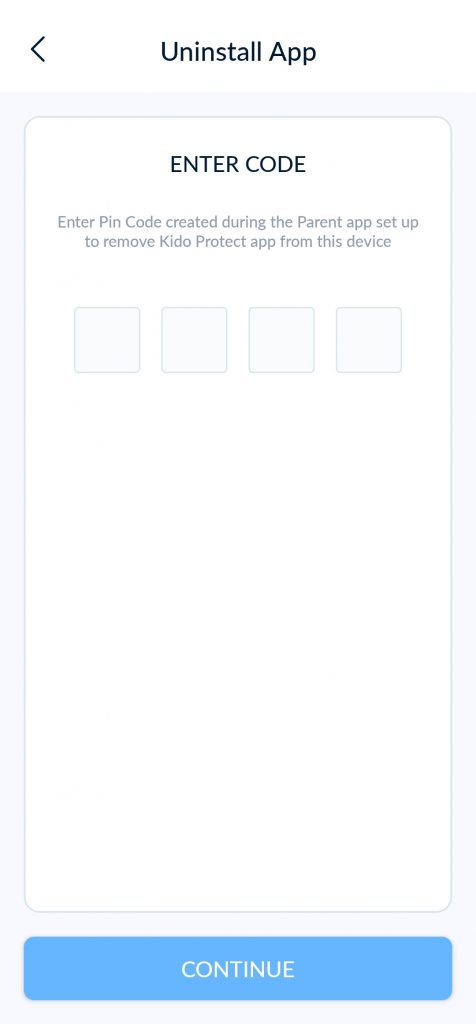
Enter the PIN code again and tap “Continue.”
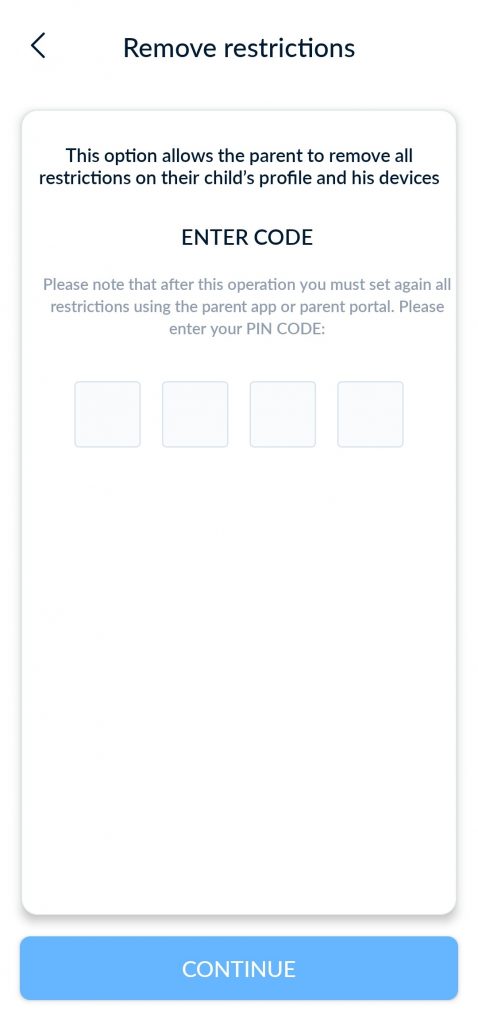
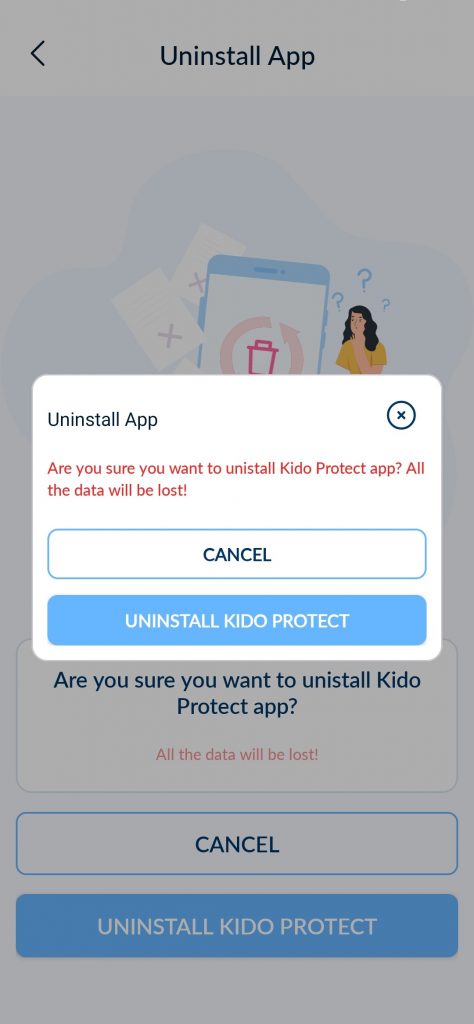
Tap “Uninstall App.” & Enter the PIN code once more to confirm, and the app will uninstall.
Method 2: Uninstalling from the Parent App
Open the parent device and click on the child profile you want to delete. Select the device from the list and click on it, then click on “Device Details”.
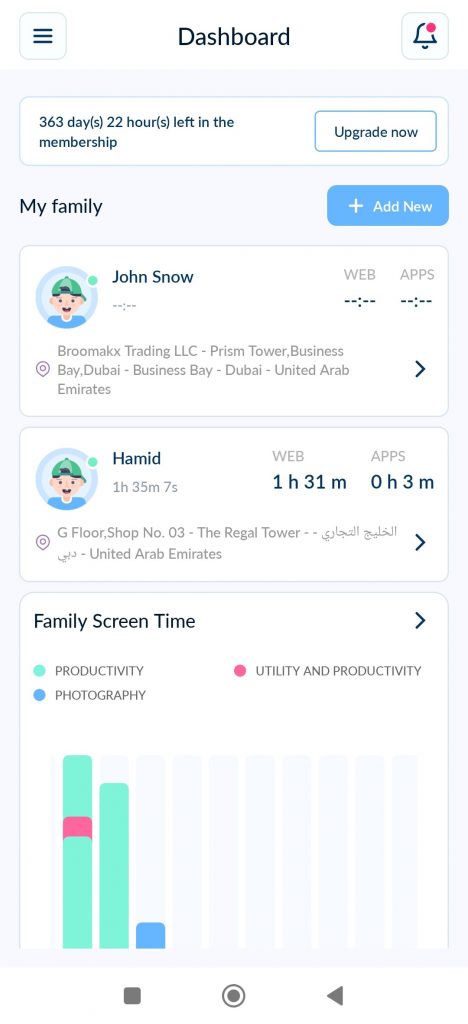
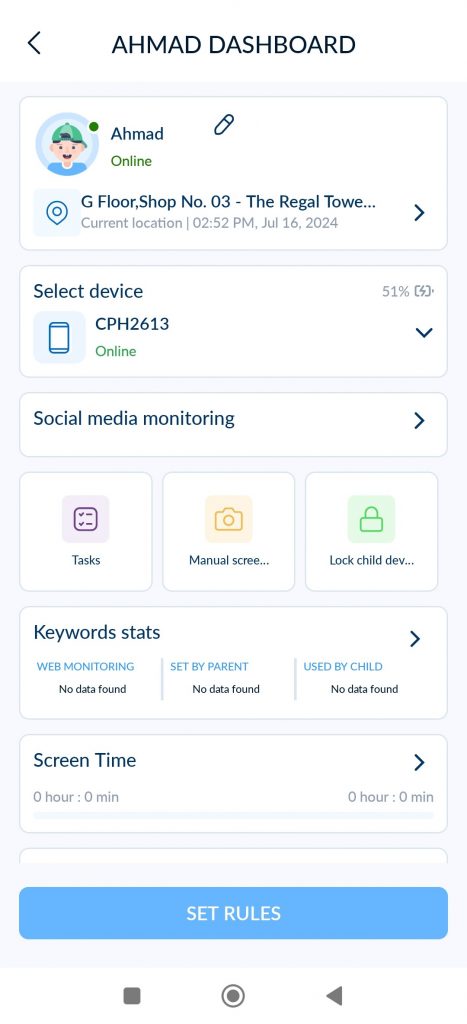
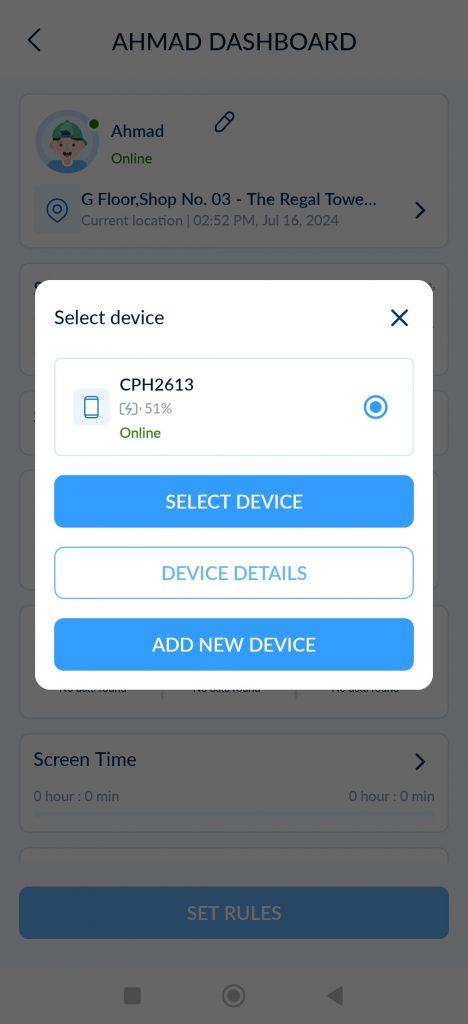
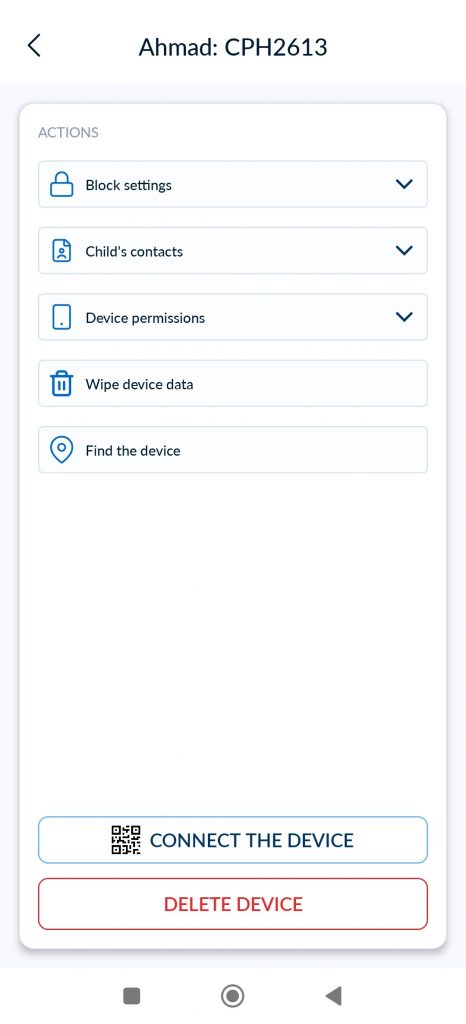
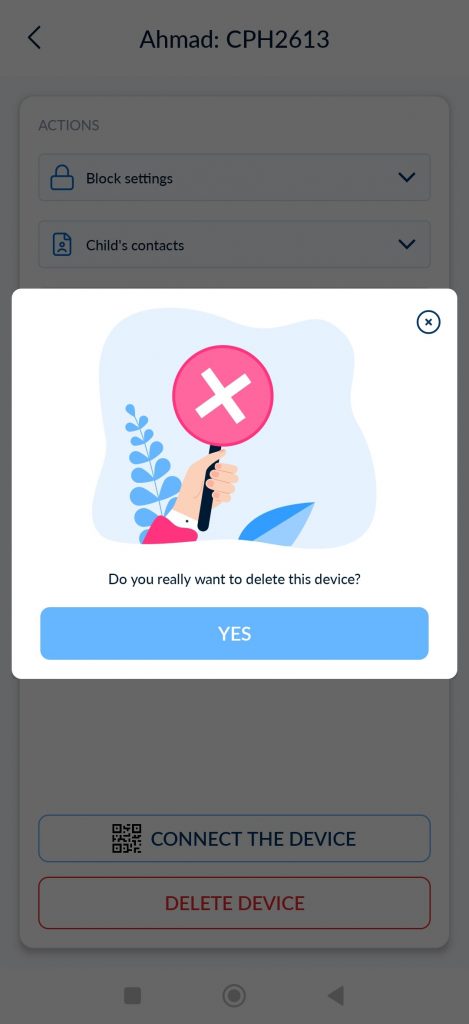
Next click on ‘Delete Device’, Then Click on ‘Yes’ To finished the Process.
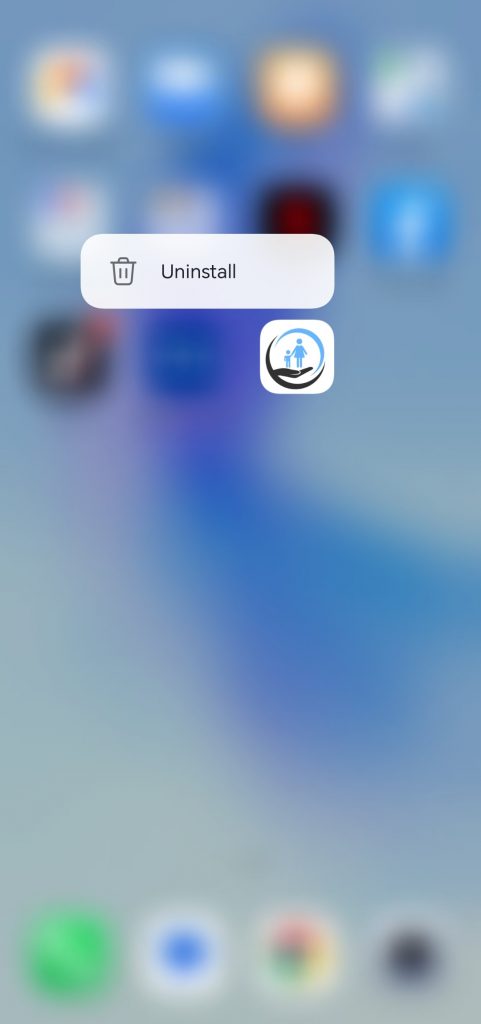
Next, on the child device: Locate the Kido Protect app. Press and hold the app icon. Select “Uninstall” and confirm.
Thank you for following this guide on uninstalling the Kido Protect app. If you have any further questions or need assistance, feel free to reach out to our support team for help.
Ensure your child’s online safety with the Kido Protect parental app. This feature allows you to use smart detection to monitor your child’s social media activities and advanced filters to instantly alert you to inappropriate language or behavior. By fostering safer communication habits, Kido Protect helps create a secure online environment for your child, giving you peace of mind as they explore the digital world.
If you’re unsure how to enable and start supervision, don’t worry. Simply watch the step-by-step video below to learn how to set up and begin supervision effectively.
Kido Protect’s task management feature is designed to simplify your parenting journey. Easily assign and monitor tasks to help your child stay productive and responsible. With seamless oversight, you can ensure tasks are completed efficiently and on time.
If you’re unsure how to enable and start task allocation, don’t worry. Simply watch the step-by-step video below to learn how to set up and begin allocating tasks effectively.
Kido Protect alerts parents to unsolicited content on their child’s device, monitoring images for nudity, drugs, violence, and harassment. Instant notifications enable parents to take quick action and protect their child’s well-being.
If you don’t know how to enable this feature and monitor your child’s device, watch the step-by-step video below.
Follow these simple steps to ensure Kido Protect runs efficiently in the background.
Note: It is essential to disable battery optimization and enable “Run app in background” for the Kido Protect app on Vivo, Oppo, Realme, Infinix, and other devices that restrict app background execution.
Pause Restrictions: Open the Kido Protect app, tap the menu, select “Pause Restriction,” enter your PIN, set the duration, and click “Save”.
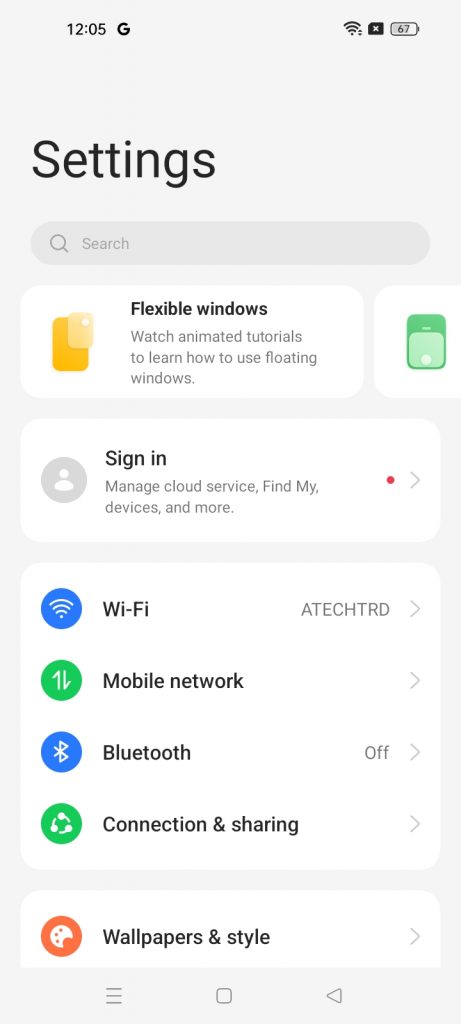
Open the phone settings on your child’s device, and use the search to find “Battery usage by app.”
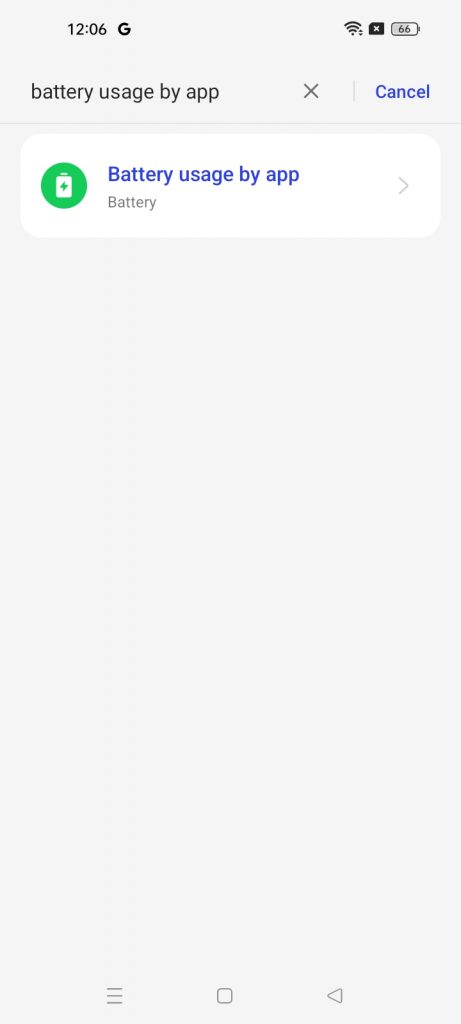
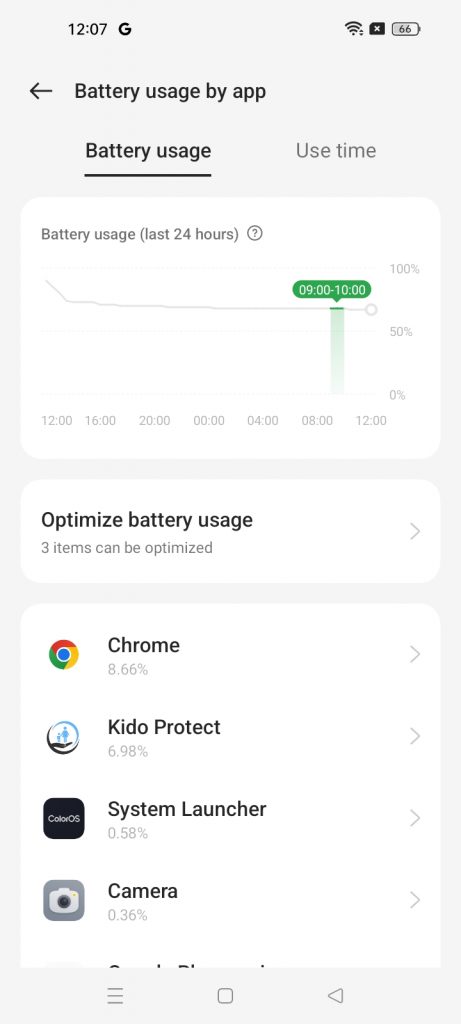
Tap on “Battery usage by app,” find the Kido Protect app, and select it.
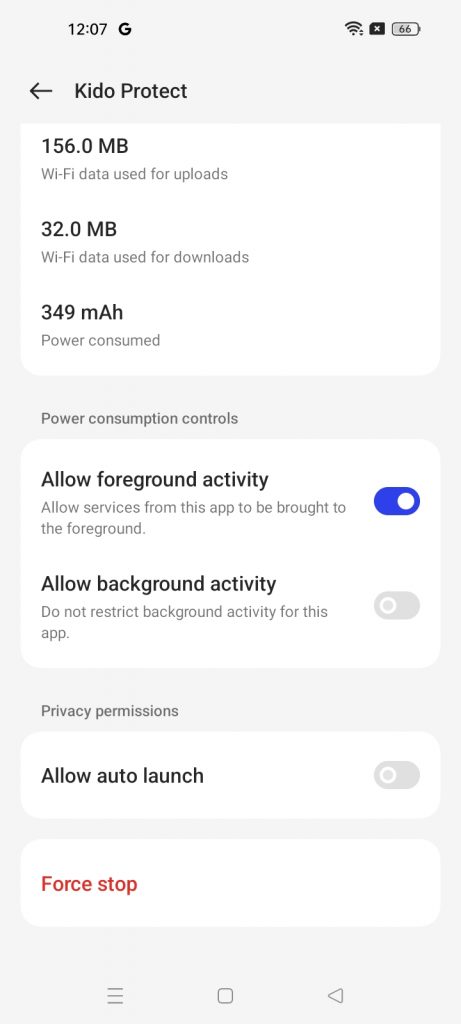
Toggle the switch for “Allow Background Activity” to the on position and click “Allow.”
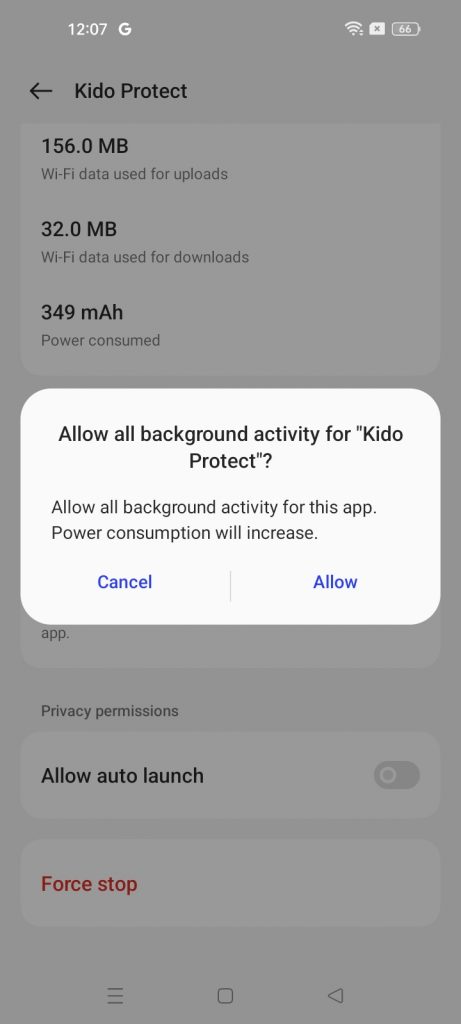
Follow these simple steps to ensure Kido Protect runs efficiently in the background. If you have any further questions or need assistance, feel free to reach out to our support team for help.
Please follow these steps to fix the ‘Unsafe App Blocked’ error on Nokia or other brand devices.
Download the application from kidoprotect.com/download.
Once downloaded, tap the application. and Navigate to settings and enable the toggle for “Allow from this source.”

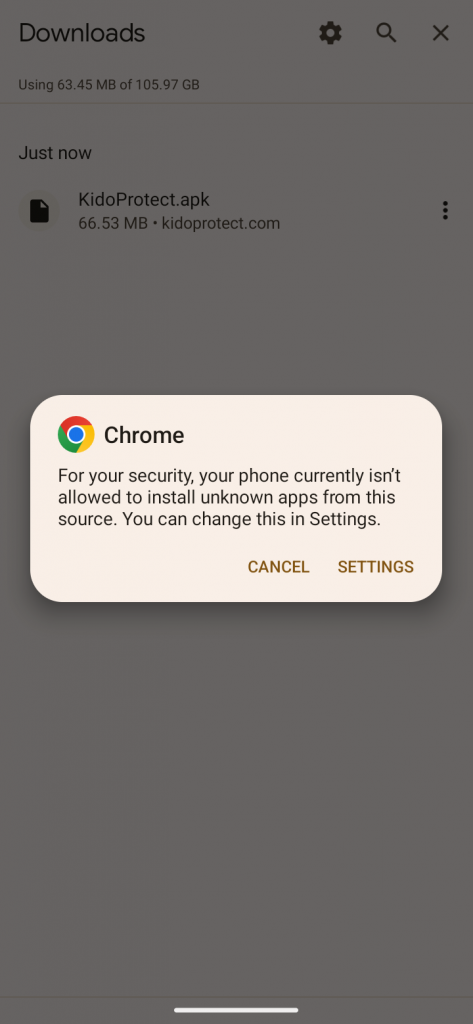
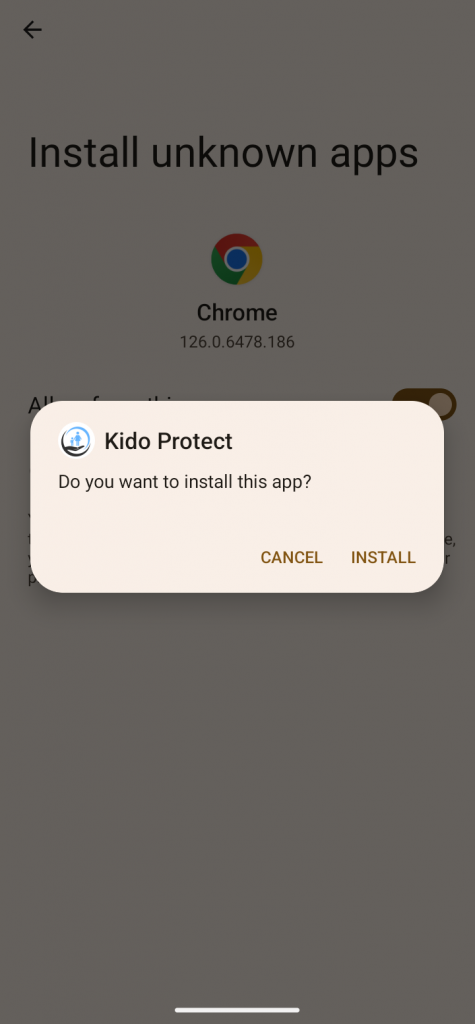
Proceed by tapping “Install,” then confirm by selecting “Install Anyway.”
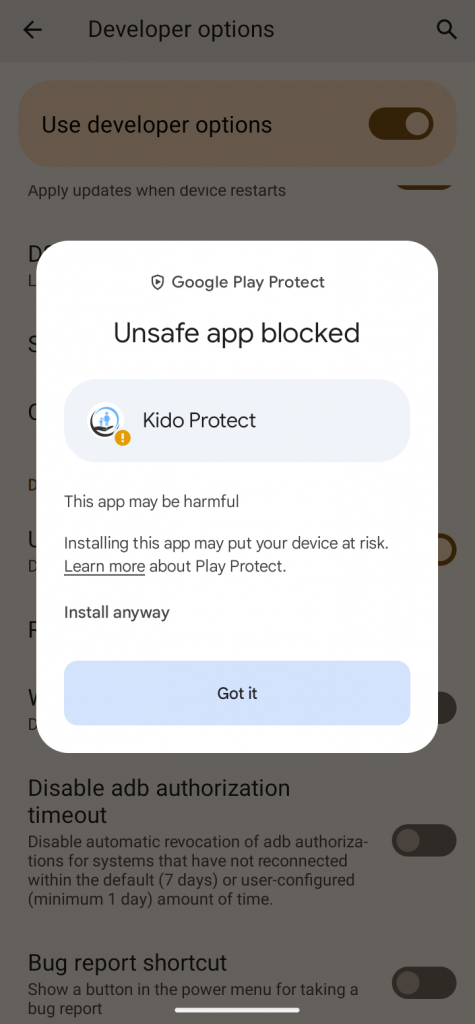

Your application is now successfully installed on the device. If you require further assistance, please don’t hesitate to contact our support team.
Learn how to prevent Infinix battery optimization from blocking the Kido Protect app’s background activity.
Pause Restrictions: Open the Kido Protect app, tap the menu, select “Pause Restriction,” enter your PIN, set the duration, and click “Save”.


Open Settings and click on the search bar, then search for “Battery Optimization.”
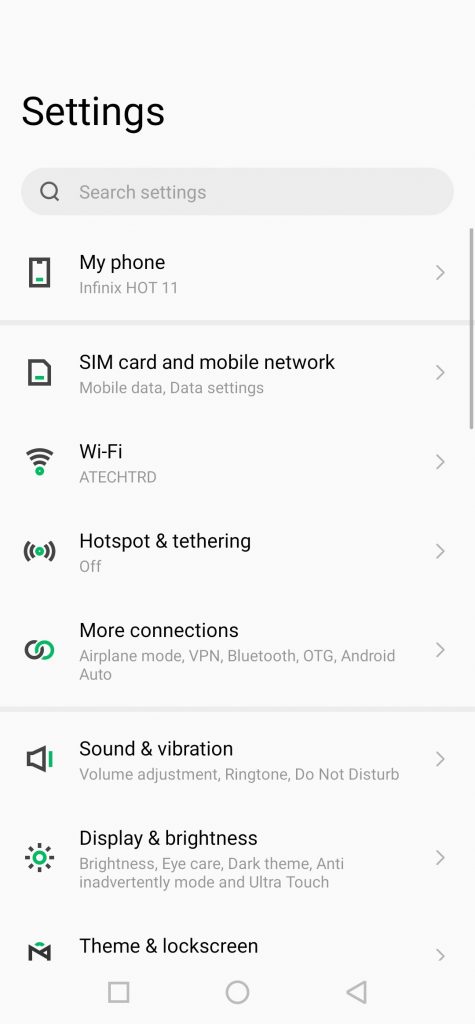
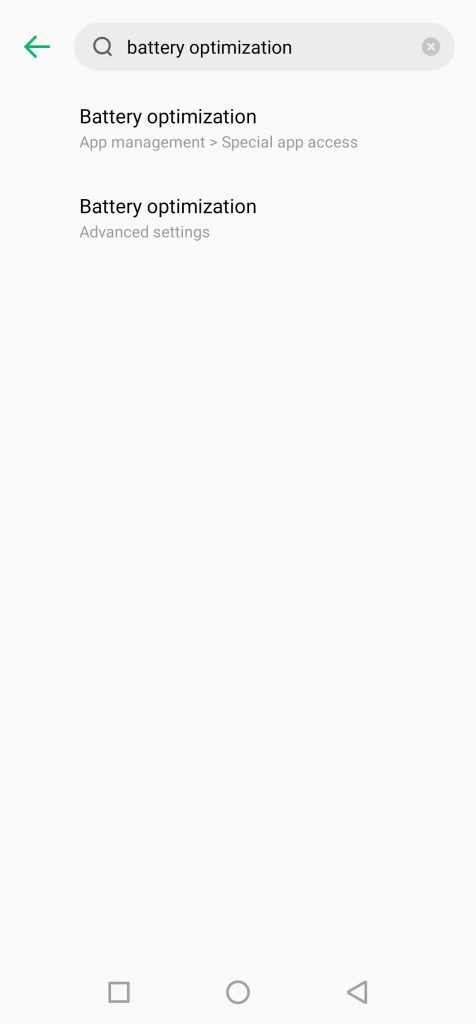
Click on Battery Optimization and find the Kido Protect app.
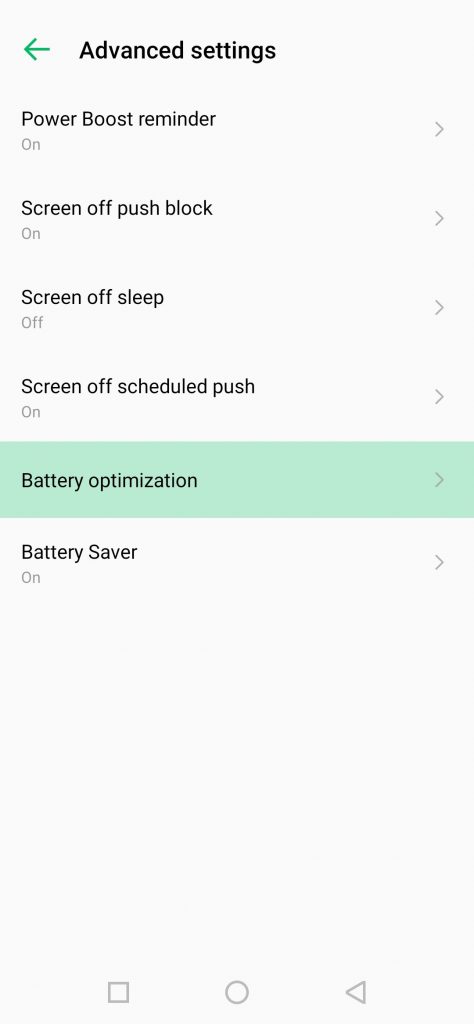
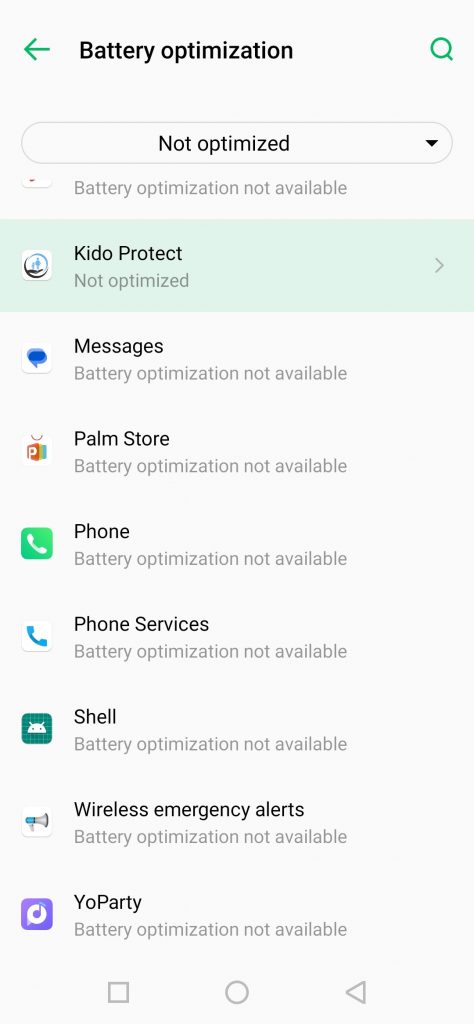
Click on the Kido Protect app and change the setting from Optimizing Battery Usage to Not Optimize.
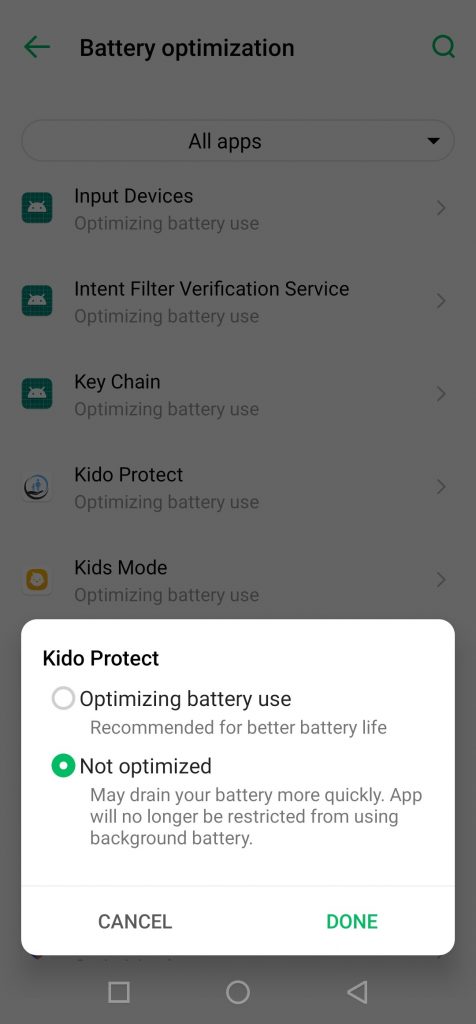
And you’re done! If you require further assistance, please don’t hesitate to contact our support team.
Adding {{itemName}} to cart
Added {{itemName}} to cart